Getting Up and Running: Installation Instructions 💨
Goals for the Week
- Sign up Github Account
- Installing some way of writing and running code
- Installing some way of working with Python and HTML/CSS/JS
Creating a Github Account
While we’ll be sharing a lot of materials via Canvas and Google Drive, we’ll also be doing some sharing and collaborating on Github. Using Github is not mandatory for assignments but it is convenient for some of them, and it’s important professionally for you to have an account.
Github is a free platform and is a popular for software development and version control (something we’ll discuss on Thursday), and I expect some of you are already familiar with it. We will be discussing some of the politics associated with the platform on Thursday, and I want to note that there are alternatives like GitLab or Bitbucket. Nonetheless, it is also very popular for digital humanities research and as a perhaps crude search option, I would actually recommend taking a look at the number of repositories on Github tagged as digital-humanities https://github.com/topics/digital-humanities.
We’ll be discussing what exactly Github is in class, but you can always check out their PR as well to get a general sense (click on the image to go to their 3 minute intro video).

To create your account, simply https://github.com/join and create a new username. Once you have your account, please share your username with the instructor so I can add you to our course repository. In terms of selecting a username, I would recommend choosing something that you plan to use professionally, unless for some reason you want to keep your activity for the course anonymous (totally your choice!).
GitHub provides additional documentation on signing up for an account. You’ll be using a free personal account to work with GitHub. Most of our work will be in public repositories, but if you are doing research that you would like to be kept private, you will also be able to set up private repositories under this account.
Installing some way of writing code
In this course, you’ll be writing code in a few different programming languages, but we’ll primarily be using Python. Given that’s the case, you have the option of primarily working in the cloud, through Google Colab https://research.google.com/colaboratory/.
You can read more about Colab here https://research.google.com/colaboratory/faq.html and it is a popular platform for those needing GPU resources. However, that’s likely to be a fairly exceptional likelihood for this class. Nonetheless, you could complete a lot of the homework assignments through this platform, so I’m letting you choose how you would prefer to work.
As an alternative, I am hoping that I can help everyone get setup to write code locally (as in on your computer). Setting up a computer to write code can be tedious and frustrating, but it is usually useful and will hopefully help with other courses as well. Also you can still use Colab if you want, even after we get everything running locally!
To work locally, I recommend that you download two things: a code editor and a terminal or console. A code editor is a bit like word processing software specifically for writing code (though you can also just write text in it), and a terminal is a bit like an app for working with files, but instead of clicking on icons, you write commands.
Code Editors

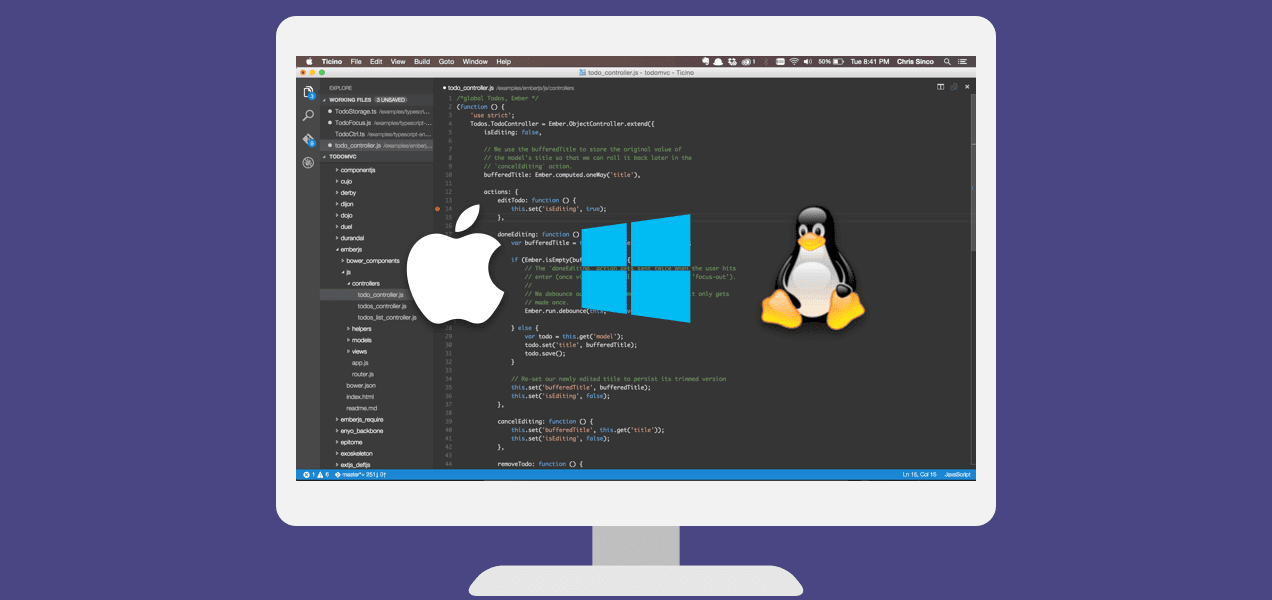
For the code editor, I highly recommend that you download and use Visual Studio Code (VS Code) https://code.visualstudio.com/. You should be able to use the link above to download VS Code for Windows, Mac, and Linux.
Another benefit of getting used to VS Code is that you can use it in the browser for any Github repository by changing .com to .dev. So for example if you took the link to our reposition, https://github.com/ZoeLeBlanc/is310-computing-humanities and switched it to https://github.dev/ZoeLeBlanc/is310-computing-humanities, you would see the VS Code version of our repository in the browser.
Terminals
For terminal, I recommend iTerm2 https://iterm2.com/ for Mac and the new Windows Terminal https://www.microsoft.com/en-us/p/windows-terminal/9n0dx20hk701 for Windows (for more info about Windows Terminal see this blog post). You should be able to use both these links to download the appropriate version for your operating system, but please let the instructor know if you are having problems.
Installing our programming languages
In the following sections, we’ll go through how to get your computer set up so that you are ready for the course. Follow the instructions for your computer type (Windows = any computer running windows, Mac = any apple computer) Most of the instructions involve clicking on links to follow instructions and pasting text into your computer. If you get stuck or have any problems, please message on Discord or email the instructor.
Windows
Installing WSL
We’ll be following the instructions for using Python for web development on Windows https://docs.microsoft.com/en-us/windows/python/web-frameworks.
First step is to install the Windows Subsystem for Linux following these steps https://docs.microsoft.com/en-us/windows/python/web-frameworks#install-windows-subsystem-for-linux.
In either PowerShell or Command Prompt, run the following command:
wsl --install
According to the instructions:
This command will enable the required optional components, download the latest Linux kernel, set WSL 2 as your default, and install a Linux distribution for you (Ubuntu by default, see below to change this).
The first time you launch a newly installed Linux distribution, a console window will open and you’ll be asked to wait for files to de-compress and be stored on your machine. All future launches should take less than a second.
FYI: You will need to restart your machine during this installation process.
After this you’ll need to setup your WSL environment following these instructions https://docs.microsoft.com/en-us/windows/wsl/setup/environment.
Specifically you’ll need to set up your Linux username and password https://docs.microsoft.com/en-us/windows/wsl/setup/environment#set-up-your-linux-username-and-password.

Once setup I would recommend first checking which version of WSL you are running and upgrading to WSL 2 if you are not already using it https://docs.microsoft.com/en-us/windows/wsl/install#check-which-version-of-wsl-you-are-running. And then I would recommend updating your packages for Ubuntu https://docs.microsoft.com/en-us/windows/wsl/setup/environment#update-and-upgrade-packages.
Customizing Windows Terminal and VS Code
Now that you have WSL installed, you can customize your Windows Terminal. I recommend using the https://docs.microsoft.com/en-us/windows/wsl/setup/environment#set-up-windows-terminal guide to customize your terminal.
You should also familiarize yourself with working with files in WSL https://docs.microsoft.com/en-us/windows/wsl/setup/environment#file-storage.
Now you can get VS Code working with WSL by following these installation instructions for working with the Remote WSL Extension https://docs.microsoft.com/en-us/windows/wsl/tutorials/wsl-vscode#install-vs-code-and-the-remote-wsl-extension.
According to the docs:
In order to install the Remote-WSL extension, you will need the 1.35 May release version or later of VS Code. We do not recommend using WSL in VS Code without the Remote-WSL extension as you will lose support for auto-complete, debugging, linting, etc. Fun fact: this WSL extension is installed in $HOME/.vscode/extensions (enter the command ls $HOME.vscode\extensions\ in PowerShell).
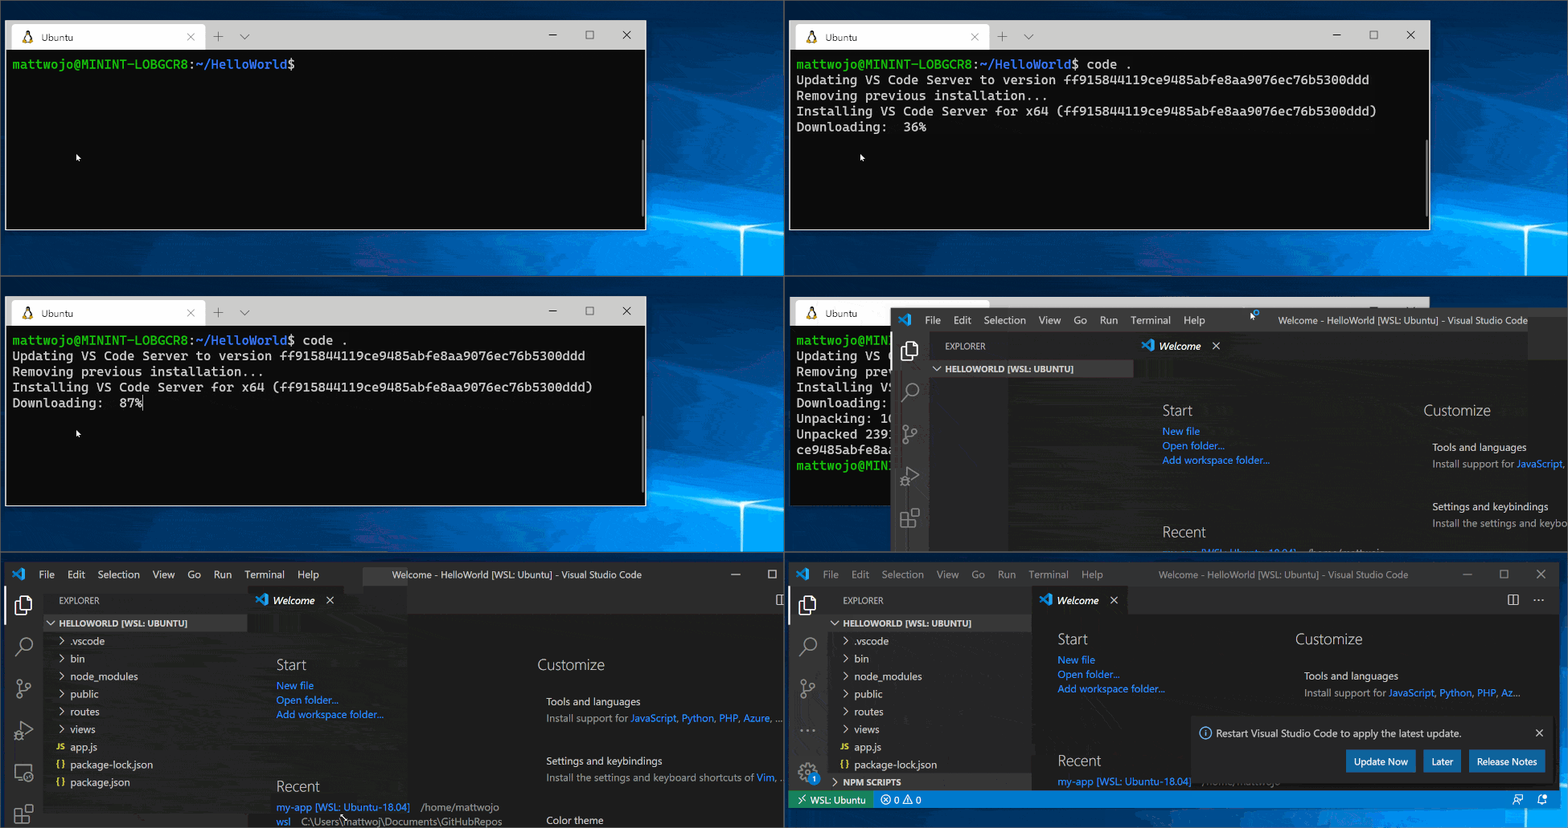
Now you can open Windows Terminal and type:
code .
And that should start your VS Code Server

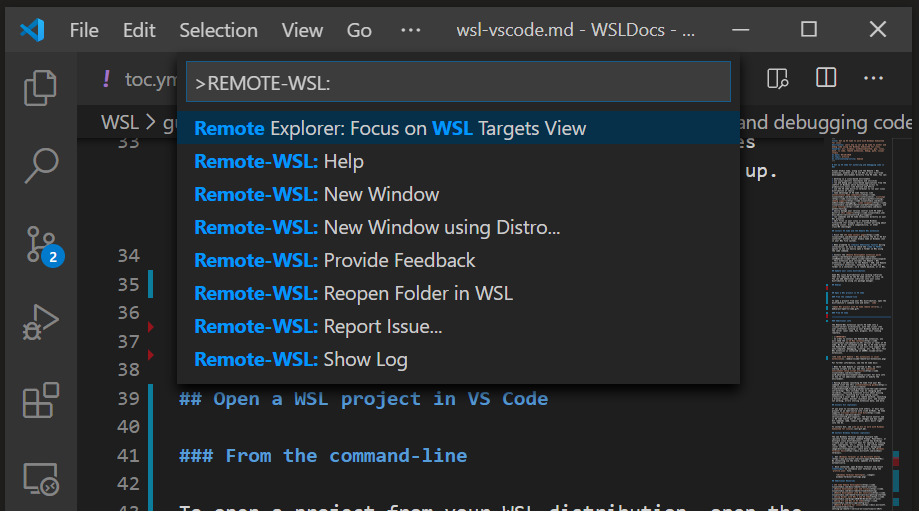
OR you can open VS Code and follow these instructions:
You can also access more VS Code Remote options by using the shortcut: CTRL+SHIFT+P in VS Code to bring up the command palette. If you then type Remote-WSL you will see a list of the VS Code Remote options available, allowing you to reopen the folder in a remote session, specify which distribution you want to open in, and more.

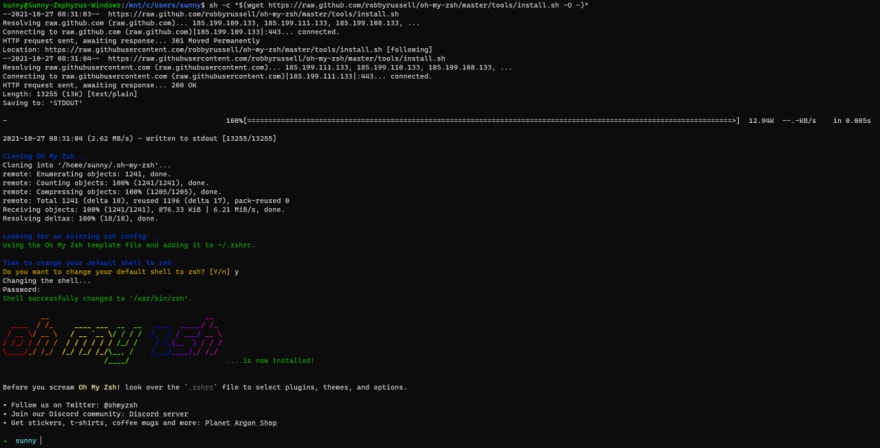
Finally, we can customize our Windows Terminal to be a little more human readable through using Oh-My-Zsh https://ohmyz.sh/.
Zsh is a unix shell and should be already installed on your WSL system. If not though you can install with the following:
sudo apt install zsh
Then you install oh-my-zsh with the following:
sh -c "$(curl -fsSL https://raw.github.com/ohmyzsh/ohmyzsh/master/tools/install.sh)"

You can find more in depth instructions here https://dev.to/contactsunny/installing-zsh-and-oh-my-zsh-on-windows-11-with-wsl2-1p5i
To learn more about zsh and terminals, check out this in-depth guide from The Missing Semester of Your CS Education https://missing.csail.mit.edu/2020/course-shell/ and https://missing.csail.mit.edu/2020/command-line/.
Installing Python and Git
Now we’re finally ready to install Python and Git 🥳! Luckily Python is already installed on Windows Subsystem for Linux, so this is relatively easy.
Just follow the three steps in these instructions https://docs.microsoft.com/en-us/windows/python/web-frameworks#install-python-pip-and-venv and you should be set to go.
Installing git is a little more complex and something we’ll be working through primarily on Thursday. However for those that are ready to continue, please follow these instructions https://docs.microsoft.com/en-us/windows/wsl/tutorials/wsl-git. Specifically, you’ll need to install git into your WSL environment, configure git to work with your Github account username and email, and then set up the Git Credential Manager https://docs.microsoft.com/en-us/windows/wsl/tutorials/wsl-git#git-credential-manager-setup.
Mac
Installing Python and Oh-My-Zsh
The instructions for installing Python are a little less convoluted on a Mac since it is already running a Unix OS (though we might hit some issues if anyone has a new M1 chip macbook). We’ll largely be following the instructions from https://docs.python-guide.org/starting/install3/osx/.
First step is to open iTerm2 and run the following command:
python --version
That should show you the version of Python you have installed, and it is likely going to be 2.7 since that ships with Mac. Unfortunately, that version is now officially retired and so will you might come across a library or two using it, you’ll end with a lot of errors if we don’t upgrade (also you can check the old countdown clock for the migration from Python 2 to 3 https://pythonclock.org/).
To upgrade our version of Python, first we’ll need to install X-Code and Homebrew.
In our iTerm2 window, run the following command:
/bin/bash -c "$(curl -fsSL https://raw.githubusercontent.com/Homebrew/install/HEAD/install.sh)"
Once that’s complete install Xcode Command Line Tools, by typing into the terminal:
xcode-select --install
Now we’ll tell our computer to use Homebrew by adding a line to our ~/.zshrc file:
open ~/.zshrc
This should open your file in a text editor. Add the following line to the bottom of the file, and then press save and exit:
export PATH="/usr/local/opt/python/libexec/bin:$PATH"
Finally back in iTerm2, run the following command:
source ~/.zshrc
Now you can install Python with brew:
brew install python
Finally, we can customize our iTerm2 to be a little more human readable through using Oh-My-Zsh https://ohmyz.sh/.
Zsh is a unix shell and should be already installed on your Mac.
Install oh-my-zsh with the following:
sh -c "$(curl -fsSL https://raw.github.com/ohmyzsh/ohmyzsh/master/tools/install.sh)"

You can find more in depth instructions here https://dev.to/hannahgooding/how-i-customise-my-terminal-with-oh-my-zsh-macos-427i
To learn more about zsh and terminals, check out this in-depth guide from The Missing Semester of Your CS Education https://missing.csail.mit.edu/2020/course-shell/ and https://missing.csail.mit.edu/2020/command-line/.
CONGRATS YOU’VE SETUP YOUR COMPUTER 🎉