Introduction to HTML and Web Scraping

What’s HTML?
According to the Mozilla website,
“HTML (Hypertext Markup Language) is not a programming language; it is a markup language used to tell your browser how to structure the web pages you visit. It can be as complicated or as simple as the web developer wishes it to be. HTML consists of a series of elements, which you use to enclose, wrap, or mark up different parts of the content to make it appear or act a certain way. The enclosing tags can make a bit of content into a hyperlink to link to another page on the web, italicize words, and so on.”
Wondering what a Markup Language is?
From handy Wikipedia, “a markup language is a system for annotating a document in a way that is syntactically distinguishable from the text, meaning when the document is processed for display, the markup language is not shown, and is only used to format the text.”
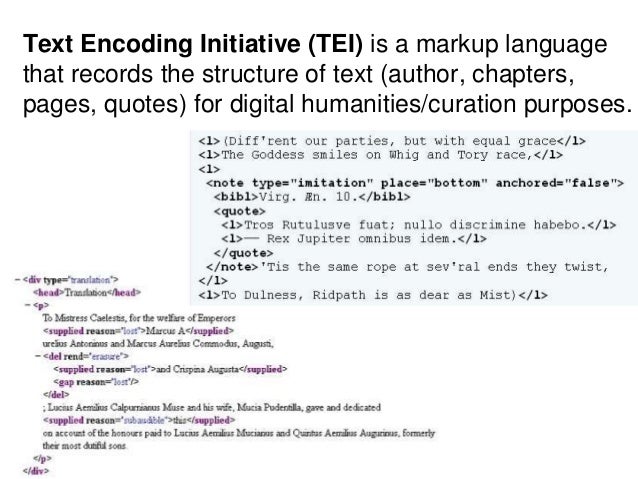 So for example many digital humanities projects use TEI (Text Encoding Initiative), which is an example of a markup language.
So what is HTML, actually?
One key thing to understand is that when you visit a website, you are actually looking at a document (not identical but similar to documents like in the Google Docs or Word document sense). The document in this case is an HTML document, but the principle is essentially the same.
So while in Google Docs, you can write text, in HTML documents, you can also write HTML to help structure how that text appears on the screen.
For example, when we write in Markdown, we use # to indicate that the text is a heading. A similar principle applies to HTML.
But rather than symbols, HTML consists of a series of tags. Tags have a name, a series of key/value pairs called attributes, and some textual content. Attributes are optional.
Let’s try an example. Say you wanted to create a website. To start off you might write some very basic text:
My first page
We can actually try rendering this in a webpage by creating a new HTML document. Create a file in your workspace called first_page.html (remember to use touch). Open the file in your editor (VSCode or whatever you’re using) and add the text above. Then save it and open the file in your browser. You should see the text we wrote!
Now in that same file, try altering the code to include some HTML tags.
<p>My first page!</p>
Save it and open the file in your Browser, what do you see? Notice anything different? Probably not!
But we added those tags? So how can we see them…
The trick is to inspect your webpage. To do that let’s right click on our page and select inspect.
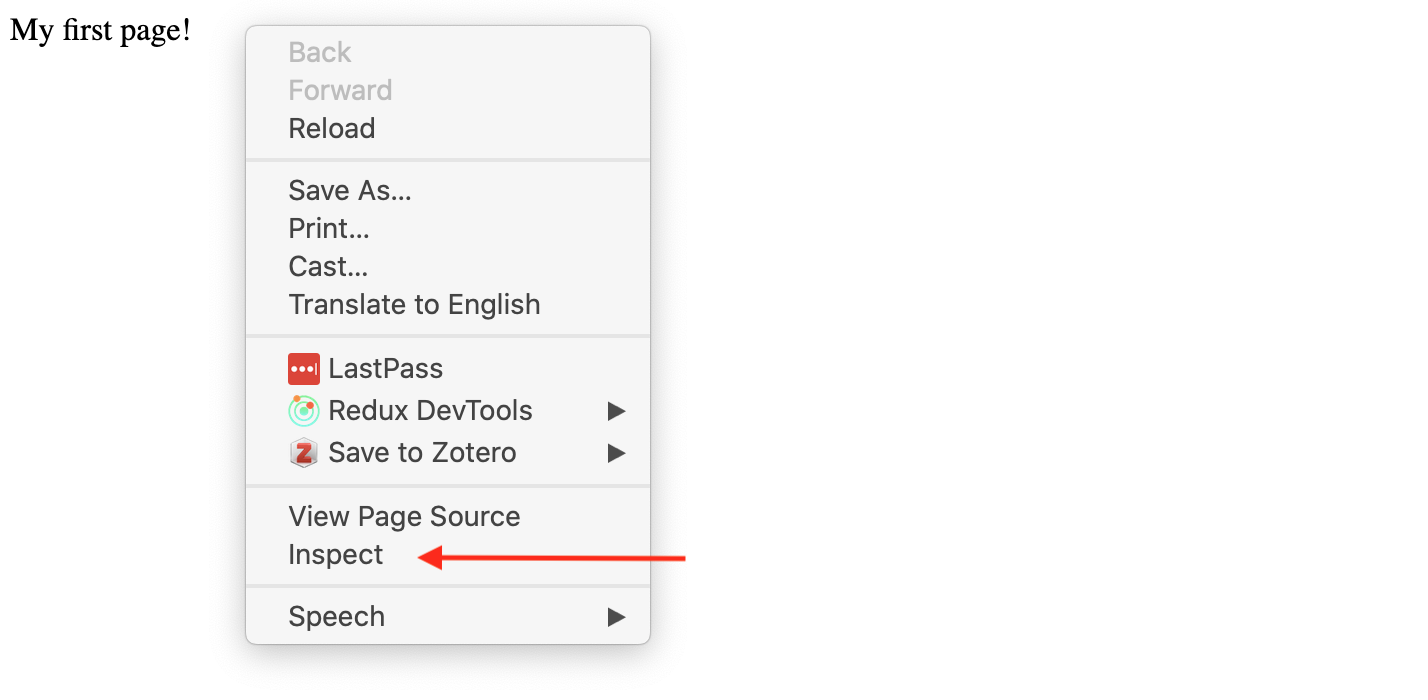
What we’re using is called the Developer Tools Console (you can find more info on Chrome’s version here and instructions for Firefox here). What we’re seeing is called the source code.
Now we can see that our tags do exist. But what exactly are they doing and why do they look like that?

This diagram is from that same Mozilla docs, where they describe the anatomy of an “HTML element”.
The anatomy of our element is:
- The opening tag: This consists of the name of the element (in this example, p for paragraph), wrapped in opening and closing angle brackets. This opening tag marks where the element begins or starts to take effect. In this example, it precedes the start of the paragraph text.
- The content: This is the content of the element. In this example, it is the paragraph text.
- The closing tag: This is the same as the opening tag, except that it includes a forward slash before the element name. This marks where the element ends. Failing to include a closing tag is a common beginner error that can produce peculiar results. The element is the opening tag, followed by content, followed by the closing tag.
That’s a lot of information, so let’s break it down further in our example.
In our HTML page, we created an HTML element using the HTML <p> tag (p means “paragraph”). This example has just one tag in it: a <p> tag. The source code for a tag has two parts, its opening tag (<p>) and its closing tag (</p>). In between the opening and closing tag, you see the tag’s contents (in this case, the text says “My first page!”).
Let’s take a look at some of the more common HTML tags that we can use to create HTML elements https://www.w3schools.com/tags/ref_byfunc.asp
How would we make it into an HTML heading?
<h1>My first page!</h1>
Great now what if we wanted to add a link so that you could click on that heading and go to another page (say the iSchool home page https://ischool.illinois.edu/)?
Well then we need to add an attribute.

This diagram is also from the Mozilla docs and you can read more about how HTML elements can also have attributes here. Some of the guidelines for using attributes are:
Attributes contain extra information about the element that won’t appear in the content. In this example, the class attribute is an identifying name used to target the element with style information.
An attribute should have:
- A space between it and the element name. (For an element with more than one attribute, the attributes should be separated by spaces too.)
- The attribute name, followed by an equal sign.
- An attribute value, wrapped with opening and closing quote marks.
Let’s try using the anchor tag and href attribute to create an HTML element that links to https://ischool.illinois.edu/
You can find a list of HTML attributes here https://www.w3schools.com/tags/ref_attributes.asp
<h1><a href="https://ischool.illinois.edu/">My first page!</a></h1>
How does this new tag change our html page?
Here’s another example that we should add to our html page, using the HTML <div> tag:
<div class="header" style="background: blue;">Digital Humanities Tools and Projects</div>
In this example, the tag’s name is div. The tag has two attributes: class, with value header, and style, with value background: blue;. The contents of this tag is Digital Humanities Tools and Projects.
Tags can contain other tags, in a hierarchical relationship. For example, here’s some HTML to make a bulleted list:
- Python
- HathiTrust
- Gephi
The <ul> tag (ul stands for unordered list) in this example has three other <li> tags inside of it (li stands for list item). The <ul> tag is said to be the parent of the <li> tags, and the <li> tags are the children of the <ul> tag. All tags grouped under a particular parent tag are called siblings.
HTML’s shortcomings by Alison Parrish
HTML documents are intended to add markup to text to add information that allows browsers to display the text in different ways—e.g., HTML markup might tell the browser to make the font of the text a particular size, or to position it in a particular place on the screen.
Because the primary purpose of HTML is to change the appearance of text, HTML markup usually does not tell us anything useful about what the text means, or what kind of data it contains. When you look at a web page in the browser, it might appear to contain a list of newspaper articles, or a table with birth rates, or a series of names with associated biographies, or whatever. But that’s information that we get, as humans, from reading the page. There’s (usually) no easy way to extract this information with a computer program.
HTML is also notoriously messy—web browsers are very forgiving of syntax errors and other irregularities in HTML (like mismatched or unclosed tags). For this reason, we need special libraries to parse HTML into data structures that our Python programs can use, libraries that can make a “good guess” about what the structure of an HTML document is, even when that structure is written incorrectly or inconsistently.
For more information, read through this introduction from Mozilla on HTML, if you have any questions or get stuck feel free to Slack the instructor.
Introduction to Web Scraping in Python
Let’s install our required packages. If you haven’t already, check out the instructions for installing a virtual environment.
We previously discussed Python libraries when we talked about classes and file input and outputs, but let’s dig in a bit deeper.
- Library: There’s a lot of different definitions for this term, but most generally you can think of this as a collection of software that’s directly used by other software. Most often, this will be a generalizable piece of logic that is useful to bundle separately so that other, unrelated pieces of software can use it. Because it’s an informal term in Python and not a specific, technical one, it’s more useful to think about libraries in terms of how code is organized. Used in this way, the concept of “software libraries” spans many different programing languages and development contexts: we have Python libraries, C++ libraries, Javascript libraries, operating system libraries, etc.
- Let’s consider libraries that we’ve used. The Python Standard Library is the most obvious example which encompasses many different purposes and packages (more on that later), but is unified in that it is included in all Python installations so that Python code that’s written using the Standard Library will run on any compatible Python environment of the expected version. Parts of the Standard Library that we’ve used before include packages like pathlib.
- There are also third-party libraries that people build in Python, which can be found on The Python Package Index (PyPI) https://pypi.org/. These are usually less expansive than the Standard Library, but can be useful because they are written for specialized tasks. This week, we’ll take a look at Beautiful Soup, which is analogous in scope to packages like pathlib. In fact, third party libraries are often organized into a single package. A library like Beautiful Soup can best be thought of in terms of purpose: you want to accomplish the a particular, common task like scraping a website and Beautiful Soup helps accomplish it.
- Package: A package is a formal term in the Python context. It’s a specific organization of code which all lives in a single directory. Libraries sometimes (often) consist of a single package (e.g. PathLib or BS4), so the term is sometimes (often) used interchangeably. Packages are the basic unit by which we install and use libraries. So when we type
pip3 install beautifulsoup4into the terminal, we’re installing the beautifulsoup4 package.
Here, confusingly, the name of the package on PyPI (beautifulsoup4) doesn’t match the actual Python code package (bs4). Always read the docs!
We use Beautiful Soup in our Python code with code that looks like this:
import bs4
soup = bs4.BeautifulSoup(html_doc, 'html.parser')
# 'bs4' is the package, 'BeautifulSoup' is a class defined inside the package definition
or
from bs4 import BeautifulSoup
soup = BeautifulSoup(html_doc, 'html.parser')
# this code is equivalent
We can also use the star symbol, which often means “all” or “any”, to import all the modules in the package:
from bs4 import *
soup = BeautifulSoup(html_doc, 'html.parser')
# imports * imports all modules in a package
In these examples, we can either the bs4 package directly or, using the from keyword, import modules from with that package.
Incidentally, it’s almost always considered poor practice to use the from x import * form. We see in the example immediately above that, for people just reading through our code, there’s no obvious connection between the bs4 package and the BeautifulSoup class. It would take some deeper understanding of BeautifulSoup or at least chasing down some its documentation
What is Web Scraping?
Web scraping is extracting data from web pages, using the syntax of a web page. It’s great for compiling datasets when you don’t already have them in a database somewhere. A good supplemental resource for web scraping is Intro to Beautiful Soup by Jeri Wieringa at The Programming Historian or Melanie Walsh’s Chapter on Web Scraping
So how do we scrape the web?
In Python, there’s more than a few different libraries we could use, but let’s continue to focus on Beautiful Soup. We’ve already installed our required packages, so let’s check that we did it correctly.
import bs4
print(bs4.__version__)
Looks good so now let’s take a look at the page we’ll be scraping, https://humanist.kdl.kcl.ac.uk/. This is a web archive of a Digital Humanities Listserv that was started in the 1980s and continues to today. Save that page to a file called humanist_homepage.html in the same directory as this notebook.
Now we can try scraping that page!
from bs4 import BeautifulSoup
soup = BeautifulSoup(open("humanist_homepage.html"), features="html.parser")

print(soup.prettify())
You can see we now have the full html page in all it’s weirdly organized HTML glory.
Now let’s figure out how to use BeautifulSoup by going to the documentation for the library
We can see here that soup is an instance of a bs4.BeautifulSoup class. This is an object that represents the whole of the document. The other important class we will use is the Tag class, which represents an html tag. These two classes actually share many of the same methods: we can use get_text() on either a BeautifulSoup or a Tag to extract just the text that they contain.
We can also use the find_all() method that they share to search with either the whole document or within the tag. Remember that tags can be nested within each other.
Let’s try and get all the links on our webpage.
links = soup.find_all('a')

for link in links:
    print(link)
We can see that we are getting lots of different links here. Everything from the Home link (which is usually just a / on most websites) to links to all the volumes.
So now we need to decide what we want to keep and what we don’t 🤔. Let’s take a look at the basic structure of the html file. We can do this easily using the development console built into most popular browsers. In Chrome or Firefox, right clicking (or control-clicking) and choosing “Inspect” or “Inspect Element”. We can see that the html is pretty basic, but it does seem like there’s some patterns for the links.
Quick Assignment
How could we get just the Volume links? We can use the find_all() method to get all the links in the document and then use get_text() to get the text of each link.
links = soup.find_all('a')

for link in links:
    print(link)
    ## Code goes here
Requests and the Web
We are now scraping a web page 🥳!! But what if we wanted to scrape more than one? Saving each manually would get tiring really quickly!
Instead we can use another Python library called requests to programmatically get each web page. Try installing and then importing requests.
import requests
response = requests.get("https://humanist.kdl.kcl.ac.uk/")

print(response.status_code)
print(response.headers)
So what is this information exactly?
Well the first line is the status code of our request and the second line is the headers that are returned with the request. This information is important because this is how we might know if we get an error when we try to request a web page. However, to understand what this means we need a quick introduction into how the web and HTTP works.
If you already know how the Web works then feel free to skip this next section. Otherwise read on!
What is the Web?
From Wikipedia: “The World Wide Web (WWW), commonly known as the Web, is an information system where documents and other web resources are identified by Uniform Resource Locators (URLs, such as https://www.example.com/), which may be interlinked by hypertext, and are accessible over the Internet.[1][2] The resources of the WWW are transferred via the Hypertext Transfer Protocol (HTTP) and may be accessed by users by a software application called a web browser and are published by a software application called a web server.”
What does this mean exactly?
When we type a url for a webpage (say google.com), we’re actually sending an HTTP request to a server that hosts the actual HTML files and data. If the server decides that our request is ok (200), then it will give us access to the webpage.
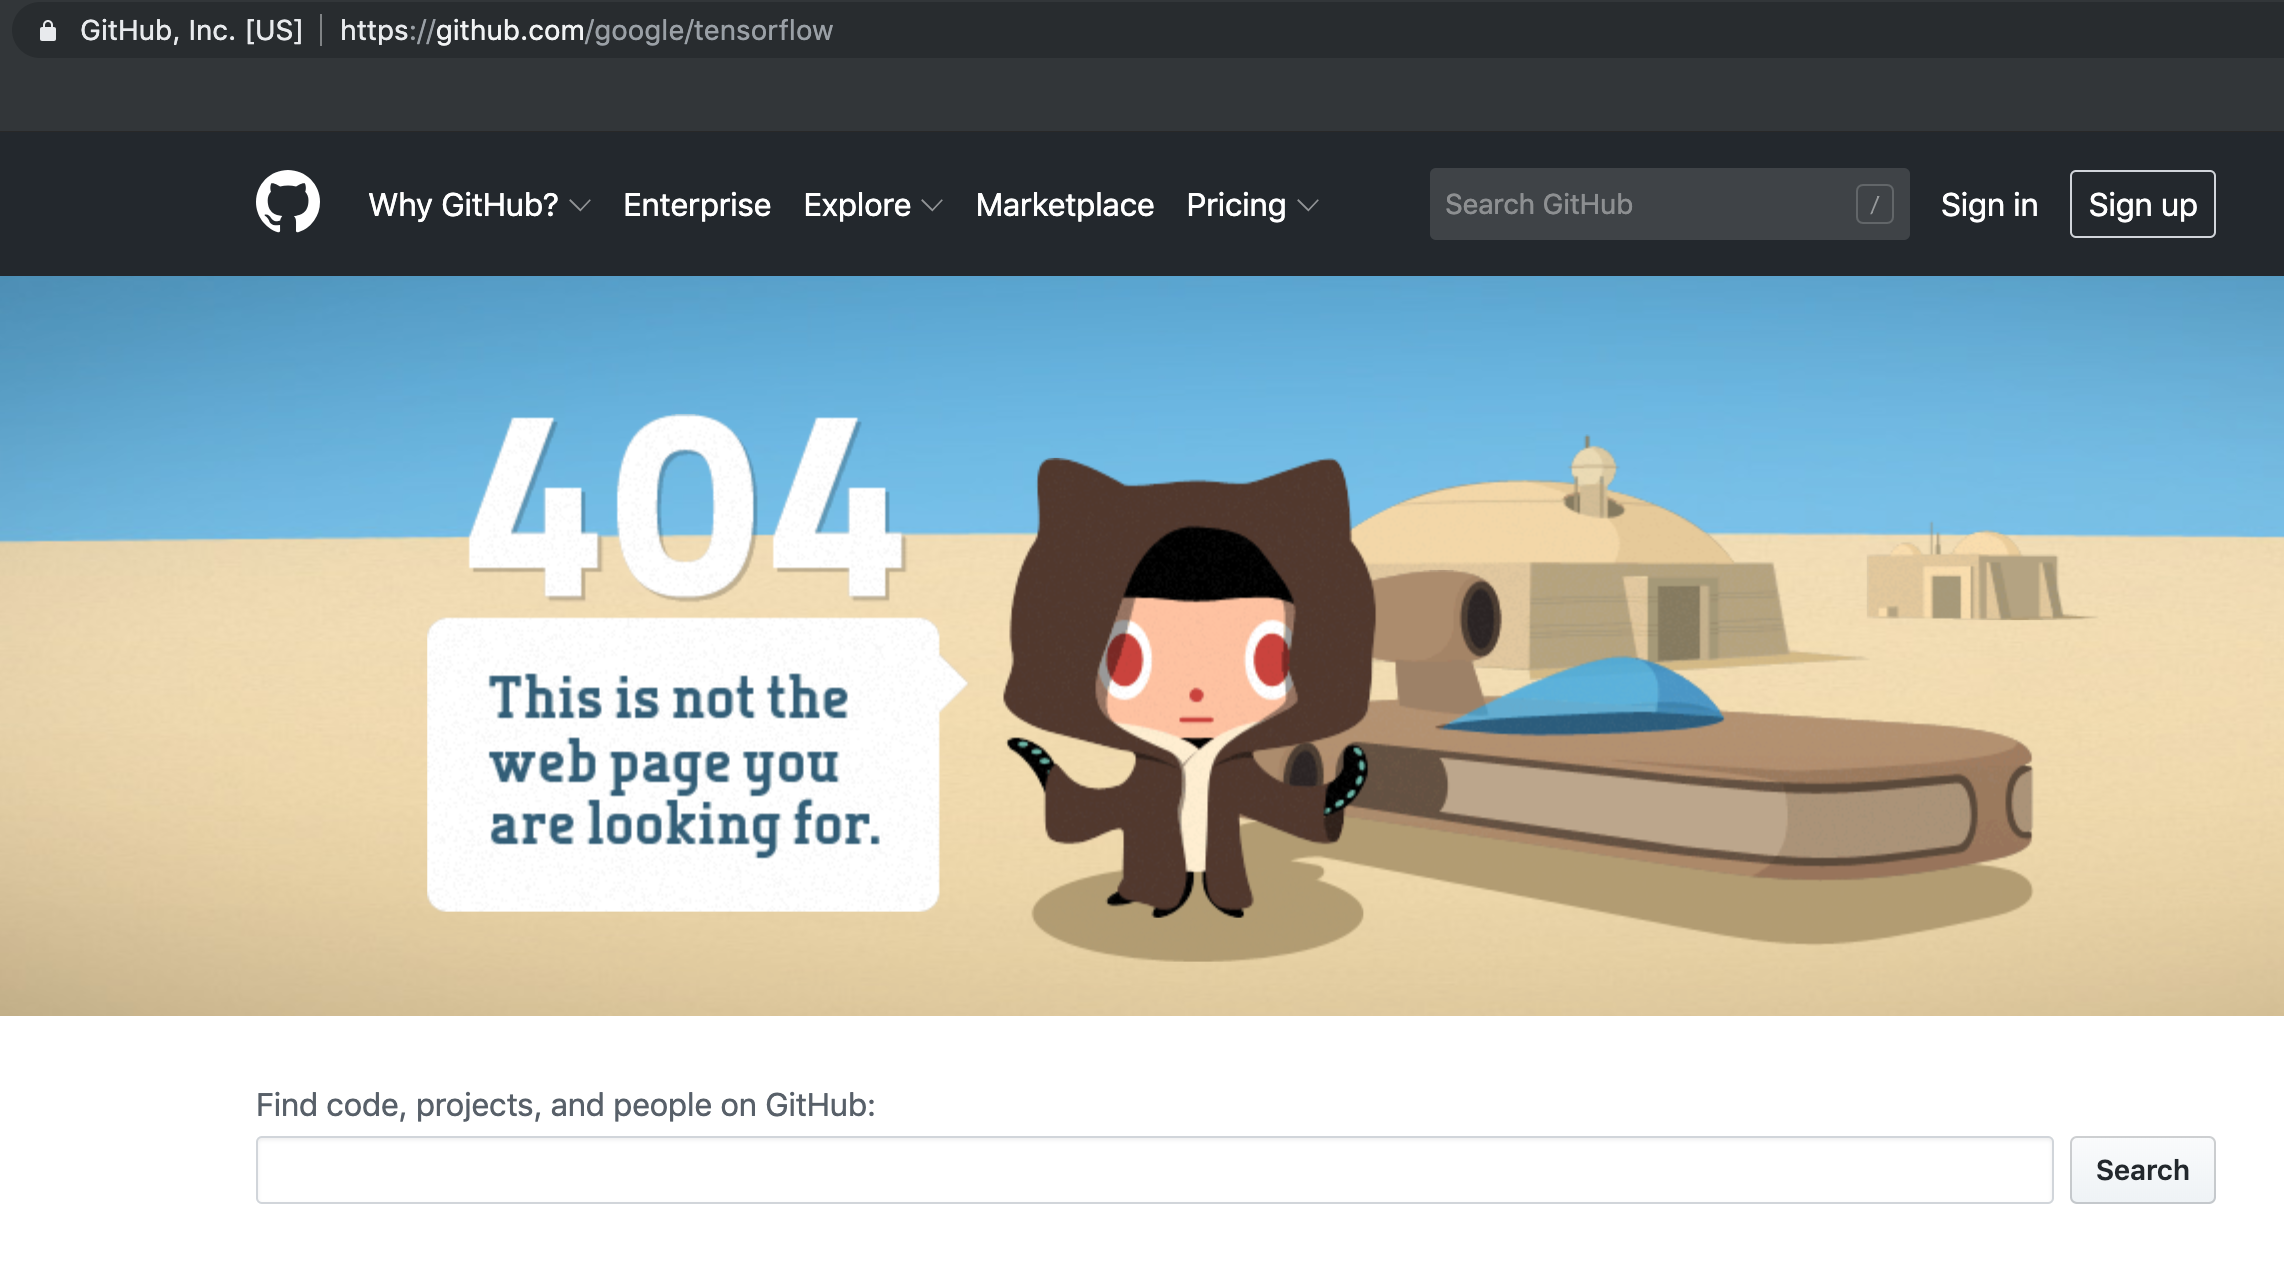
If you’ve ever seen an error message when you go to a webpage saying the page doesn’t exist, that means that you received a 404 error, which is a type of status code you get back from an HTTP request.
What is HTTP?
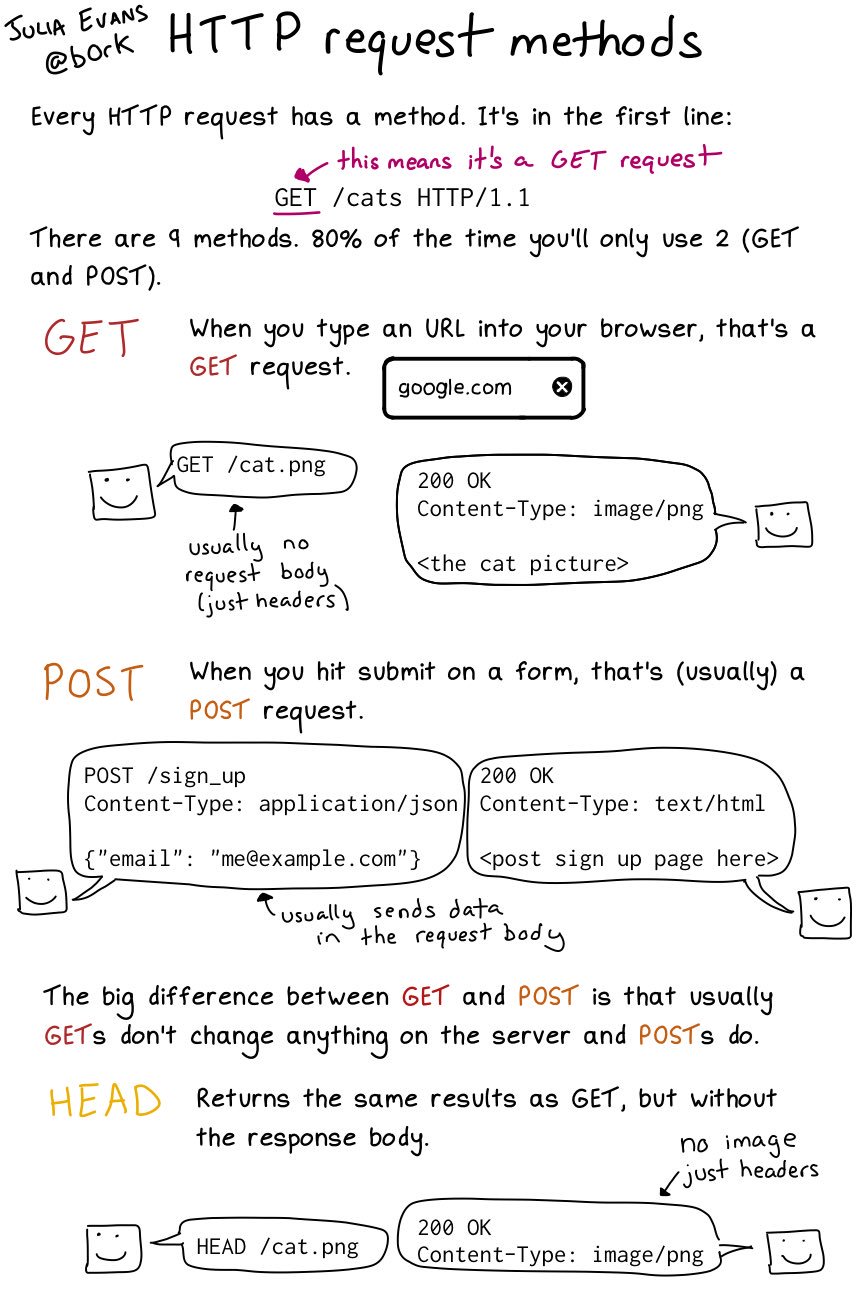
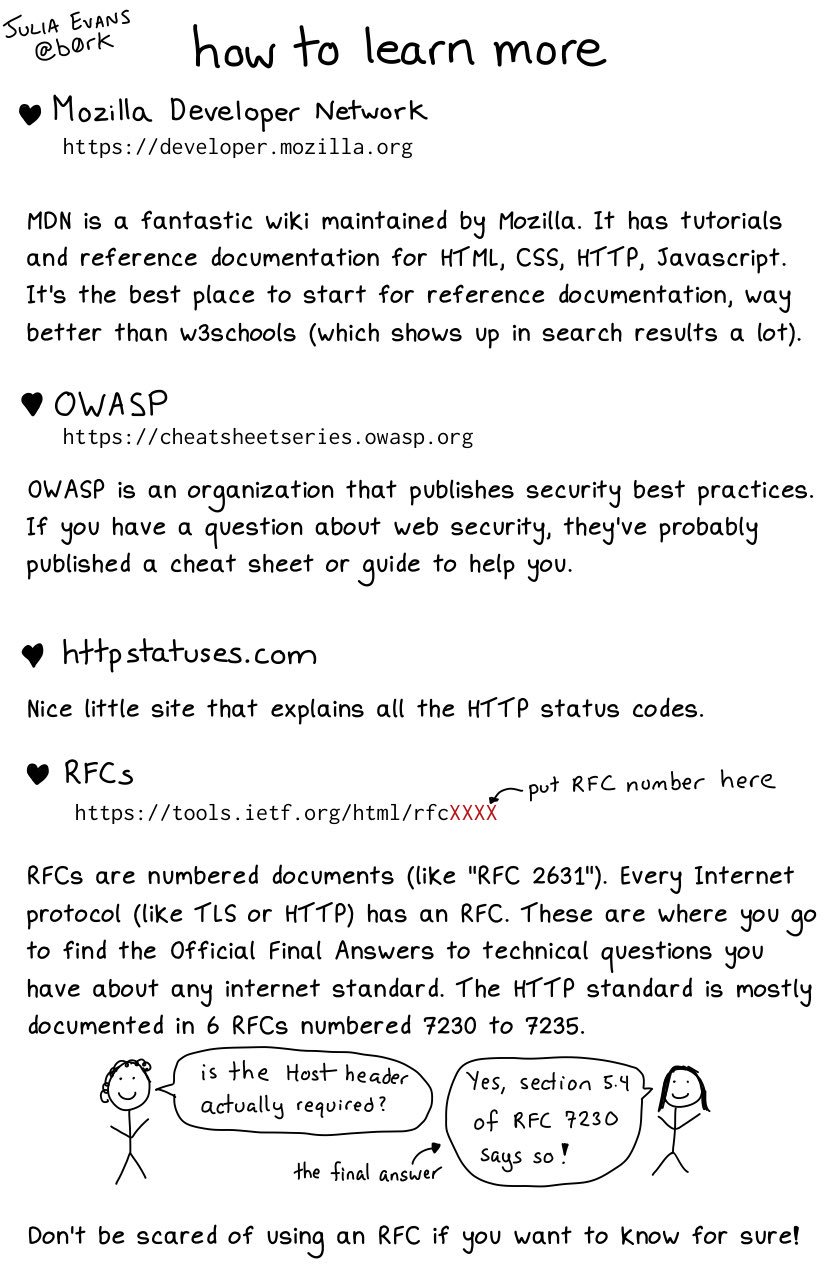
Courtesy of Julia Evans’ Zine
This comic explains a bit more in depth what is comprised of an HTTP request. We also want to have a sense of what types of status codes we can get back from a request.
Finally, in our example we used the GET method when calling a webpage (using request.get()), but there’s multiple methods that we can use to send data across the web.
More information about HTTP from Mozilla Docs
If you’re interested in the longer history of the internet checkout this timeline from the Computer History Museum, covering the history from the 1960s to the 1990s https://www.computerhistory.org/internethistory/.
Requesting and Souping Humanist
Alright so now we know how the web works in a broad sense, but let’s jump back into our example and into this section of the Cultural Analytics textbook.
Prior to this section, Melanie has this code block that fetches the text of a webpage:
def scrape_screenplay(url):
    response = requests.get(url)
    html_string = response.text
    return html_string
Let’s try out response.text with our code block.
print(response.text)
Notice that this looks familiar 🤔! It’s our HTML from the webpage that we had previously downloaded and we can double check by passing it into BeautifulSoup.
soup = BeautifulSoup(response.text, "html.parser")
print(soup.prettify())
Wonderful! Now we could for example loop through and scrape the text of each of the Volumes on the Humanist Listserv site.
Have any questions or issues? Either post it to Discord or message the instructor.


