Introduction to Web Publishing
Now that we have explored how to create and curate cultural data, as well as how to analyze it, the final part of this pipeline is sharing and preserving our efforts.
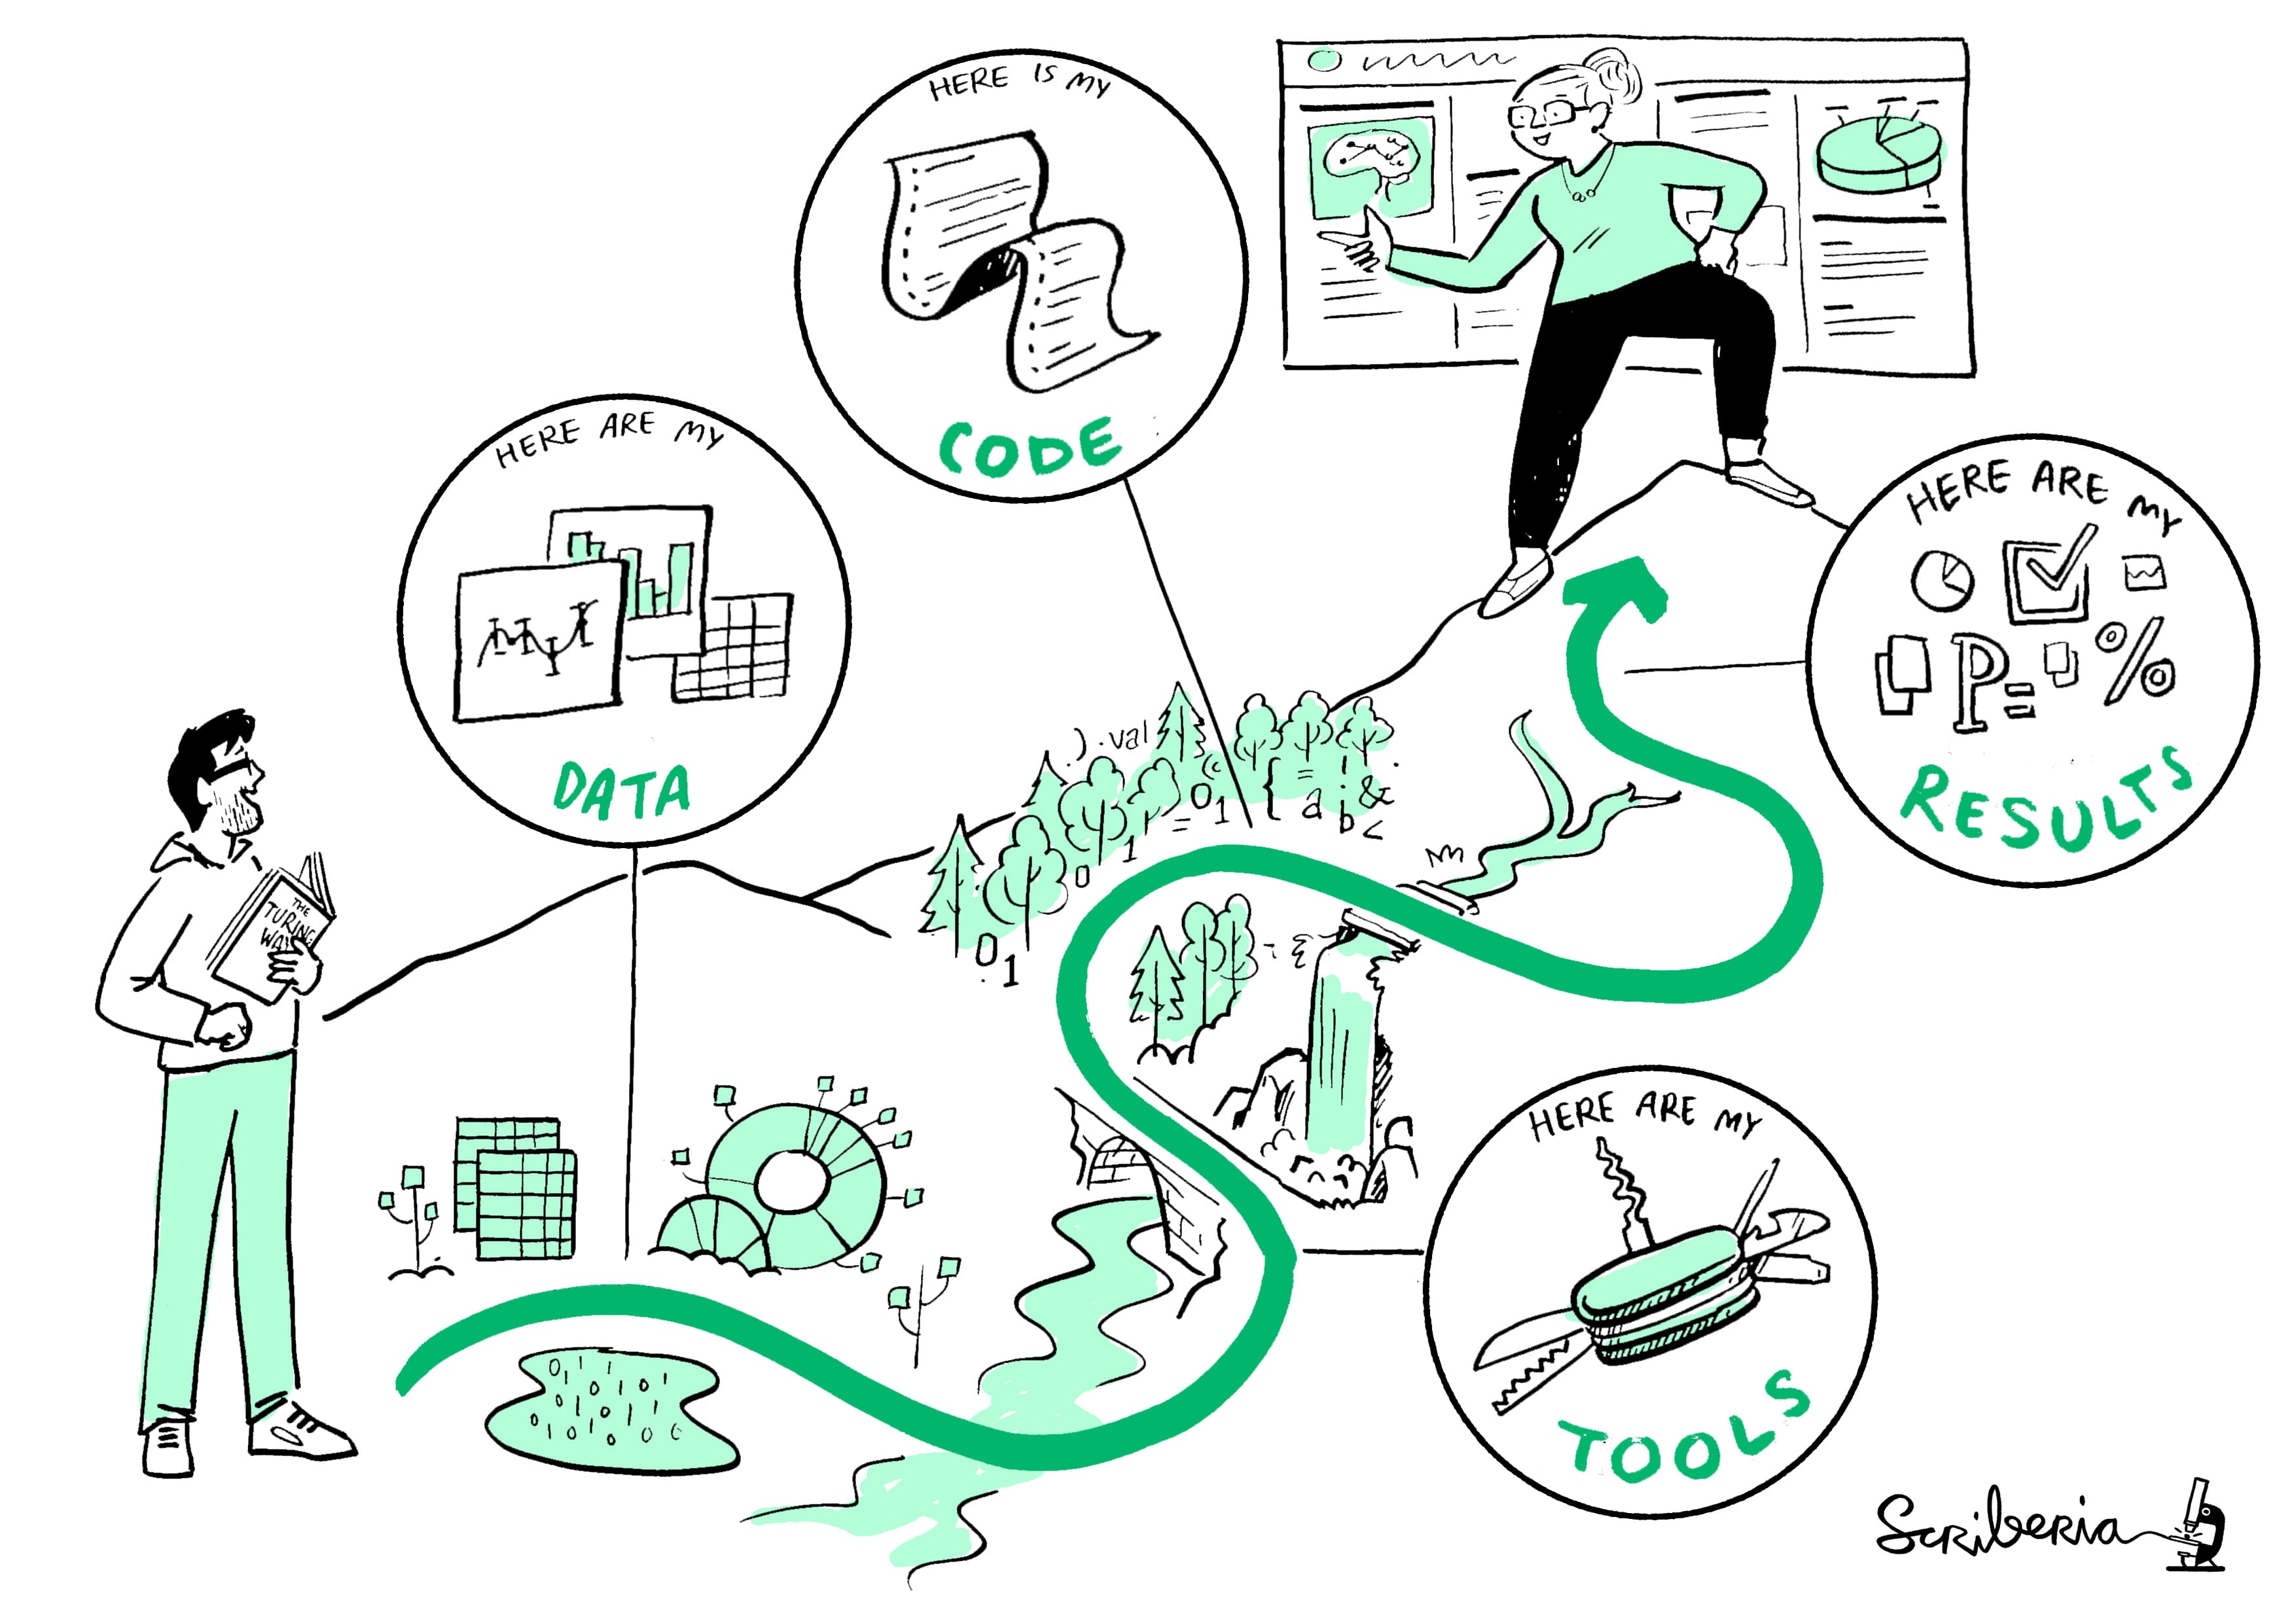
The figure above is from The Turing Way, a community-driven book project that aims to provide a comprehensive guide to reproducible, ethical, inclusive, and collaborative data science, especially for those working with cultural data. I would highly recommend checking out their resources if you are interested in learning more about these topics.
Documentation & Data Management
Documentation and data management might seem trivial or boring topics, but in actuality, they are crucial to the success of any project. Without proper documentation, it can be difficult to understand what you did, why you did it, and how you did it. This can lead to confusion, errors, and ultimately a lack of reproducibility.
Now reproducibility is not a topic we’ve discussed much in class, and that’s because while movements like Open Science and Open Data are gaining traction, they are still relatively new to the humanities. In particular, it’s not always clear what reproducibility means for cultural data.
For example, in the course, we’ve had multiple moments where we have seen how our interpretation shapes the data we create and how we analyze it. This means that even if we share our data and code, it might not be possible to reproduce our results exactly. This is not a bad thing, but it does mean we need to be thoughtful about how we document our work and the audience we are trying to reach.
I particularly like the following figure and guidelines from the Turing Way:
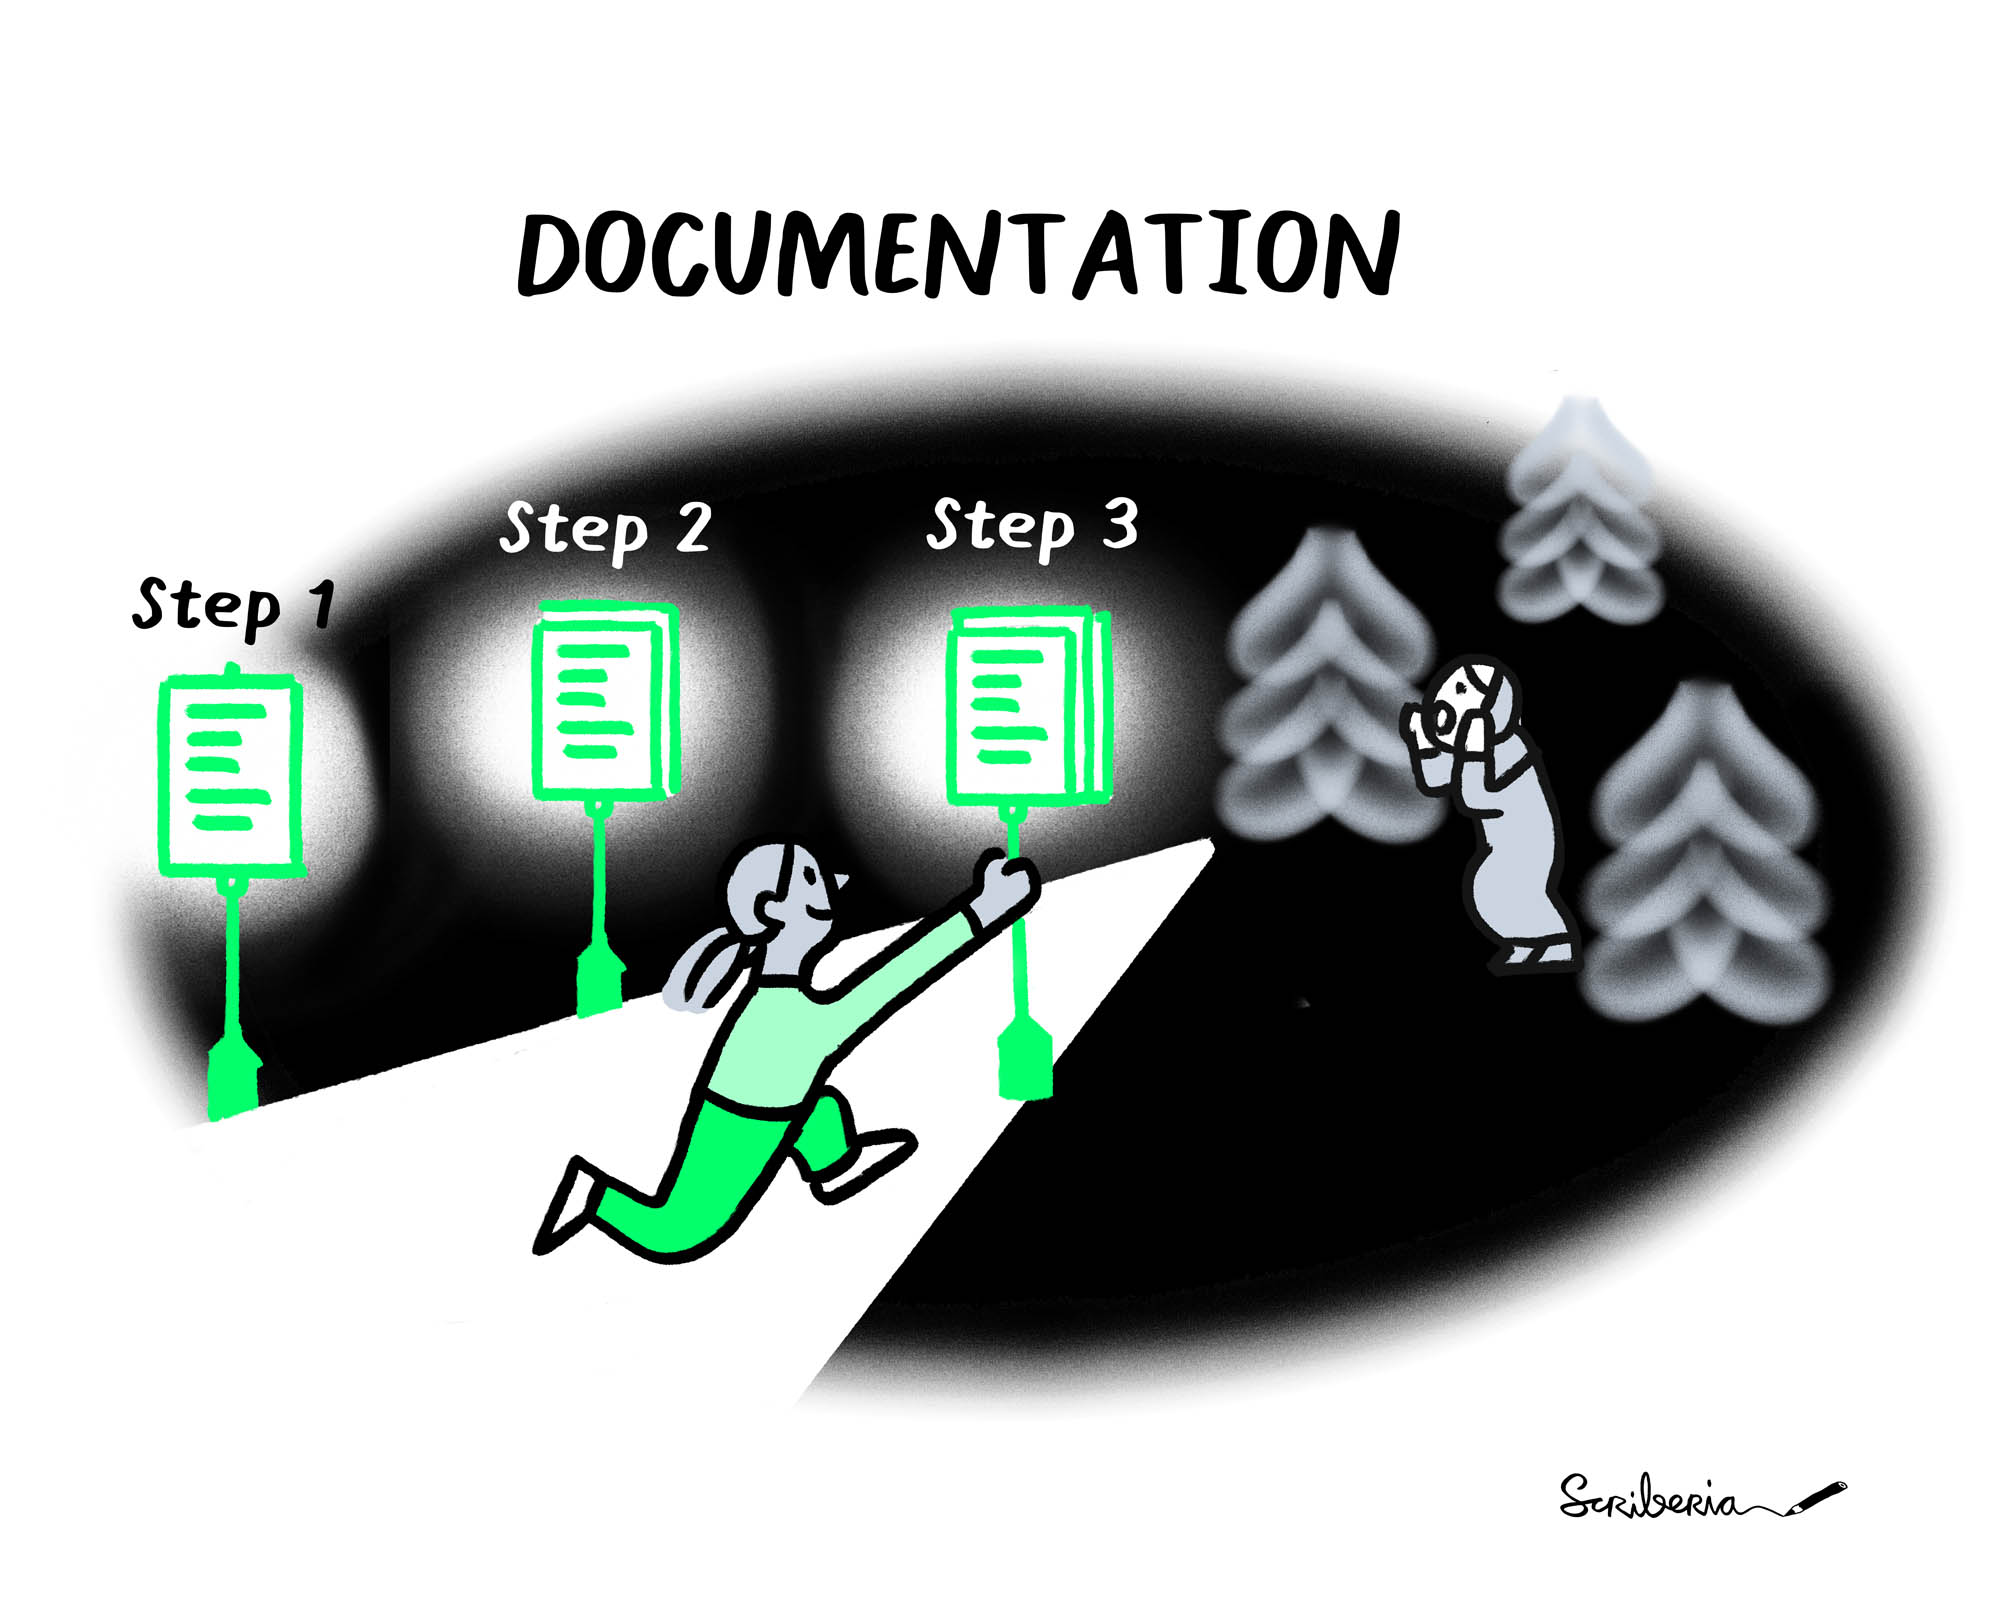
Which shows documentation as being analogous to helping people find their way in a dark forest, so sort of like a lamp or a map. The guidelines they provide for documentation are also quite useful, https://the-turing-way.netlify.app/reproducible-research/rdm/rdm-metadata.html:

You’ll notice they have a number of suggestions, some of which might be particularly useful for your final projects. For example, making sure you have a README.md in your GitHub repository, or creating a data dictionary or a codebook to help explain your data.
In addition to their suggestions for documentation, the Turing Way also has some guidelines for how to best format and share data. In particular, they build from Karl Broman and Kara Woo’s Data Organization in Spreadsheets suggestions for how to best format your data in a spreadsheet, which include the following:
- Save Interoperable Formats. This means saving your data in a format that can be easily read by other software, like CSV or TSV. This can help avoid issues with proprietary formats like Excel, which can sometimes cause problems when sharing data.
- Make Backups. This means saving your data in multiple locations, so you don’t lose it if something goes wrong.
- Avoid Non-Data Content. This means avoiding color coding, merged cells, and other formatting that might make it difficult to read your data or use the data programmatically.
- Be consistent. That means using the same units, the same date format, the same spelling, etc. One option is to use a data dictionary or codebook to help explain your data, especially for things like categorical variables.
- Choose good names for things. That means using descriptive names for your columns and rows.
- Write dates as YYYY-MM-DD. This is the international standard for dates and can help avoid confusion.
- No empty cells. If you don’t have data, use a placeholder like
NAorNULL, but try to avoid empty cells in how you format and organize your data. Also though if you have missing data, be sure to document that and be thoughtful about how you handle it. For example, you might want to use a placeholder likeNAorNULLto indicate missing data, rather than just leaving a cell blank which could be interpreted as a zero by some software. - Put just one thing in a cell. This means avoiding merged cells, and trying to keep your data organized in a way that makes it easy to read and understand.
- Make it a rectangle. This means avoiding having data in the header or footer of your spreadsheet, and trying to keep your data in a rectangular shape.
These are general guidelines that can help you format, organize, and document your data and code in a way that makes it easier to share and understand. This is crucial for preserving your work and making it accessible to others. But most importantly, I would encourage you to think of documentation as a chance to share both your interpretative choices and articulate the principles that you want others to follow when engaging with and using your materials.
Digital Publishing
The final step in our pipeline is digital publishing. This is where we take our data, our analysis, and our interpretation, and share it with the world. There are many ways to do this, from creating a website, to publishing a paper, to sharing your data on a repository. There’s also a number of considerations that should inform how we publish our work, including:
- Audience. Who are you trying to reach with your work? Are you trying to reach other scholars, the general public, or a specific community?
- Accessibility. How can you make your work accessible to the widest possible audience? This might mean making your work open access, or providing alternative formats for people with disabilities.
- Interactivity. How can you make your work more engaging and interactive? This might mean using multimedia, or creating interactive visualizations.
- Sustainability. How can you ensure that your work will be preserved and accessible in the future? This might mean using open standards, or depositing your work in a repository.
- Politics/Ethics. How can you ensure that your work is ethical and responsible? How does our choice of technologies or infrastructures build-in certain ethical and political commitments? This might mean obtaining informed consent, or protecting the privacy of your subjects. It might also mean thinking about how your work might be used in the future, and how you can ensure that it is used responsibly.
There is no one-answer to these questions, but they are important to consider as you think about how to publish your work. In this class, we will focus on one way to publish your work, which is creating a website.
Publishing with GitHub Pages & Static Site Generators
In Introduction to the Web, we learned how to host a single HTML page on GitHub Pages. This is a great way to share your work, but it can be a bit limiting if you want to create a more complex website.
One of the more popular approaches that we learned about in our readings on minimal computing is to use static site generators. The term “static site” refers to a website that is made up of HTML files, rather than being generated dynamically by a server. This means that the site is faster, more secure, and easier to host than a dynamic site, but it also means that it can be more difficult to update and maintain.

As you can see from this figure, there are a number of static site generators available, each with its own strengths and weaknesses. Some of the most popular options include Jekyll, Hugo, and Gatsby, but there are many others to choose from, and essentially most modern programming languages have one.
The core thing to know is that almost every static site generator works in the same way: you write your content in Markdown, you run a command to build your site, and then you host the resulting HTML files on the web. In this lesson, we will be exploring how to use the Pelican static site generator to create a website, but you can use any static site generator you like. Part of how you might select a static site generator is based on the programming language you are most comfortable with, as well as the features you need for your site. Furthermore, you might consider the pre-built themes and plugins that are available for each static site generator, as well as the community support and documentation.
Creating a Pelican Site
Pelican is a static site generator that is built in the programming language Python. You can see the documentation for Pelican here https://docs.getpelican.com/en/stable/ and the GitHub repo here https://github.com/getpelican/pelican. Pelican is less popular than some other static site generators in Computing in the Humanities (for example, this course website is built in a different one called Jekyll), but it is a good option if you are already familiar with Python.
To create a new Pelican site, we need to follow the instructions in the documentation https://docs.getpelican.com/en/latest/quickstart.html. Which tells us that first we need to activate our virtual environment and install Pelican, along with the Markdown library. We can do this with the following commands (though remember to replace your correct virtual environment name):
For Macbook/Linux/WSL:
source env/bin/activate
pip install pelican markdown
For PowerShell:
.\env\Scripts\Activate.ps1
pip install pelican markdown
Next, we need to make sure we are in our correct directory and also create folder for our new site. You are welcome to try making this directory in your is310-coding-assignments folder, but I would recommend creating this site in your GitHub username folder, so that you can easily host it on GitHub Pages (so that would be the username.github.io folder).
Once you are in the correct folder and have everything installed, you can run the following command to create a new Pelican site:
pelican-quickstart
This will ask you a series of questions about your site, including the title, the author, and the URL. In our case, we will give it the following answers:

You can name your site whatever you like, but I would recommend using your GitHub username so that you can easily host it on GitHub Pages.
These answers will create a new Pelican site with the following structure:
content/
output/
tasks.py
Makefile
pelicanconf.py
publishconf.py
You don’t need to memorize this structure but it’s good to know that the content directory is where you will put your Markdown files, the output directory is where your HTML files will be generated, and the pelicanconf.py file is where you can configure your site. So for example, if we wanted to change the name of our website or its url, we could do that in the pelicanconf.py file.

Once we have the folder open in VS Code and we can also try adding some content. For example, we can create a new Markdown file, named my-first-post.md, in the content directory:
Title: My First Post
Date: 2024-04-17
Category: Python
Tags: pelican, python
Slug: my-first-post
Authors: Zoe LeBlanc

This is my first post using Pelican!
Once we save that file, we can start using the static site generator to build our website with the following command:
pelican content
This will generate a series of HTML files in the output directory, which we can then serve locally from our computer using the following command:
pelican --listen --autoreload
You should see the following in your terminal:

And then when you click on the link http://localhost:8000/, you should see your new site:

Remember when we discussed IP addresses and domain names? This localhost is essentially the IP address for your computer, and the 8000 is the port number. So when you click on that link, you are essentially telling your web browser to look for the website on your computer. This is a great way to test your site before you publish it to the web.
As long as everything is working, you should see your new site in the browser. We can also explore the HTML files in the output directory to see how Pelican has converted our Markdown file into a series of HTML files.

We can also update our Markdown post to include more content, like an image or a code block:
Title: My First Post
Date: 2024-04-17
Category: Python
Tags: pelican, python
Slug: my-first-post
Authors: Zoe LeBlanc
This is my first post using Pelican!
Adding some more content here, like an image:
Now when we save the file, our server should automatically update and we can see the new content in the browser:

Our next step might be adding more pages or posts to our site, or we could also explore customizing the theme. Pelican comes with a number of pre-built themes, but you can also create your own theme or modify an existing one. You can find more information about how to do this in the Pelican documentation https://docs.getpelican.com/en/stable/themes.html.
Adding Pages & Files to Pelican
To add a new page to your Pelican site, you can create a new Markdown file in the content directory. For example, you could create a new file called about.md with the following content:
Title: About
Date: 2024-04-17


This is the about page. It's a great place to tell your visitors about your site, your goals, and your story. You can edit this page by opening the /content/pages/about.md file.
Once you save the file, you can rebuild your site with the following command:
pelican content
And then you can rebuild your site with the following command:
pelican --listen --autoreload
You should see the new page in your browser when you click on the link http://localhost:8000/about.html.

We might also want to change the links at the bottom of our page to include the course website. We can do this by editing the pelicanconf.py file and specifically the LINKS section:
# Blogroll
LINKS = (
    ("Pelican", "https://getpelican.com/"),
    ("Python.org", "https://www.python.org/"),
    ("Jinja2", "https://palletsprojects.com/p/jinja/"),
    ("You can modify those links in your config file", "#"),
)
We can change the last link to point to the course website, like so:
# Blogroll
LINKS = (
    ("A Course Project", "#"),
    ("IS310 Course Website", "https://zoeleblanc.com/is310-computing-humanities-2024/"),
)
Now we can see the new link in the footer of our site:

In addition to adding pages or tweaking links, we can also create a new folder in our content folder to store files or images we might want to use in our site. For example, we could create a new folder called assets and then within that we can add a new folder called images and one called files. In images, we could save our Python Logo file called python-logo.png. We can then reference this image in our Markdown files like so:

One of the key things we need to change though is also in our pelicanconf.py file, where we need to tell Pelican to copy the assets folder to the output folder. We can do this by adding the following line to bottom of the file:
STATIC_PATHS = ['assets/images', 'assets/files']
This will tell Pelican to copy the assets folder to the output folder when it builds the site. This is important because otherwise, the images or files won’t be available when you publish your site.
So now when we refresh our site, we should still see our image but if we inspect the page, we should see that the image is being loaded from the assets folder, rather than the initial URL:
We can read more about linking to static content in the documentation https://docs.getpelican.com/en/latest/content.html#linking-to-static-files. Now that we are starting to get a sense of how everything works together, we can start to think about how we might customize our site further.
Customizing the Theme
One of the main values of using a static site generator, beyond the ones we’ve already discussed, is that it comes with pre-built themes that you can use to style your site. In the case of Pelican, we can see what themes are available by running the following command:
pelican-themes -l
This will list all the themes we have currently installed. But we can also take a look at curated lists of available themes that we could install. To do that we can visit, the Pelican Themes preview site https://pelicanthemes.com/ and take a look at what is available.

Then once we decide on a theme we like, we can go to the Pelican Themes GitHub repository https://github.com/getpelican/pelican-themes, where we can find the theme we want as a submodule. According to the documentation, the easiest way to install one of these themes is to clone the full pelican-themes repository in a new directory:
git clone --recursive https://github.com/getpelican/pelican-themes ~/pelican-themes
Now this will create a new directory called pelican-themes in your home directory, which you can then navigate to and see all the themes available. You can then install the theme you want by running the following command:
pelican-themes --install ~/pelican-themes/waterspill
However, I would recommend creating a themes directory in your Pelican site and then copying just the theme you want into that directory. This way you can keep your theme separate from the Pelican themes repository and it will be easier to manage. So for example, I want the waterspill theme, so I’ve copied that folder into my themes folder, which is my Pelican site directory.
Then, I need to add a new line to my pelicanconf.py file to tell Pelican to use the new theme. I can do this by adding the following line to the file:
THEME = 'themes/waterspill'
Now, I can recompile my site with the new theme by running the following command:
pelican content -t themes/waterspill
And then I can serve my site with the new theme by running the following command:
pelican --listen --autoreload
Which should give us the following in our browser:

Now that we have a new theme, we can start to explore how to customize it further. We can do this by editing the base.html file in the theme directory. This file is the main template for the site, and it controls the layout and styling of the site. We can edit this file to change the colors, fonts, and layout of the site, as well as to add new features like a navigation bar or a footer.
Publishing Your Site with GitHub Pages
Once we are happy with our site, we can publish it to the web using GitHub Pages. We have already used GitHub Pages to make our static HTML pages available on the web, but we can also use it to host more complex sites like the one we’ve created with Pelican.
Now to do this we can either publish our site as our username.github.io site, or we can publish it as a project site. The difference is that the username.github.io site is a personal site that is available at https://username.github.io, while a project site is available at https://username.github.io/project-name. I would recommend publishing our site as a project site, so that we can keep our username.github.io site for those wanting to learn about us, but you can use either option.
To publish our site as a project site, we need to create a new repository on GitHub with the name that we want to use for our site. For example, I could create a new repository called is310-example-project. Once we have created the repository, we now need to add our SITEURL to our pelicanconf.py:
SITEURL = 'https://username.github.io/project-name'
If you are not creating a project page, then you can just use SITEURL = 'https://username.github.io'.
Then we should generate our site one last time with the following command:
pelican content -o output -s publishconf.py -t themes/waterspill
These flags tell Pelican to build the site using the publishconf.py file, which is a configuration file that tells Pelican to optimize the site for production, and to use the waterspill theme. This will generate a series of HTML files in the output directory that we can now copy to our new repository.
Now we will change our directory to the output folder and then initialize a new git repository in that folder:
cd output
git init
Then we need to add all the files in the folder to the repository and commit them:
git add .
git commit -m "Initial commit"
Then we need to add the remote repository to our local repository:
git remote add origin git@github.com:ZoeLeBlanc/is310-example-project.git
Now we can push our site to the remote repository:
git push -u origin main
Once we have pushed our site to the remote repository, we can go to the repository on GitHub and go to the settings tab. Then we can scroll down to the GitHub Pages section and select the main branch as the source for our site. We can also choose a theme for our site, and then we can see our site live on the web at https://username.github.io/project-name.
You can see an example, I’ve created for our class http://zoeleblanc.com/is310-example-project/.
Interactivity with Altair Charts
You’ll notice I’m using a different theme (this one is called alchemy), and that I’ve uploaded more pages that correspond to the sections of the example final project I’ve created here.
If you click on the data analysis page, you’ll notice I’ve also included some interactive Altair charts. The way I did that was by altering the theme slightly so that it could include the necessary JavaScript and CSS files for Altair.
First, I needed to save the Altair charts as json files, using the following code:
# Chart is the variable containing the Altair chart and the string is the file name and path for saving the json file.
chart.save('humanist_top_terms.json')
You can read more about saving Altair charts as json files https://altair-viz.github.io/user_guide/saving_charts.html#json-format.
I then added my files to the files folder in the content directory of Pelican, similar to how we added images. This is crucial to make sure that Pelican can find the files when it builds the site.
Now that we have our charts saved and ready to display, we also need to alter the theme to include the necessary JavaScript files for Altair. This involves editing our theme files to be customized for our tasks. This requires a bit more HTML knowledge, but you can always ask the instructors or GitHub Co-Pilot for help.
The first step is making sure that we can load the required JavaScript files for Altair. If you remember back to our Introduction to the Web, we learned how to load external JavaScript files in the head of an HTML document. We can do the same thing in our theme to load the Altair JavaScript files.
To do this, we need to open the main HTML file for that theme (in this case was base.html, though it might be index.html for other themes) and adding the following lines to the head of the document, where the theme is loading in the required JavaScript files:

You can see an example of this here, in the example project files repository https://github.com/ZoeLeBlanc/is310-example-project-files/blob/main/themes/alchemy/templates/base.html:
You’ll recognize the script tags, but the rest of the code is in a new format called Jinja2. Jinja2 is a templating language that allows us to embed Python-like code in our HTML files. Templating languages are a way to programmatically generate HTML files, which can be useful for creating dynamic websites. In this case, we are using Jinja2 to check if the page or article has a metadata field called altair. If it does, we load the Altair JavaScript files. This is a way to tell Pelican to only load the Altair JavaScript files for articles that have an altair metadata field.
Then in the Markdown file for the page (in this case data_analysis.md), we add the following metadata to tell Pelican to load the Altair JavaScript files:
Title: Data Analysis and Visualization
Date: 2024-04-17
Slug: data-analysis
Authors: Zoe LeBlanc
sortorder: 3
altair: True
This will now load the Altair JavaScript files for this page. The next step is to get our files loading in the page. To do this, we need to add some divs to the Markdown file where we want the charts to appear. This involves adding the following code block to the Markdown file:
<div id="humanist_top_terms"></div>
<div id="humanist_top_terms_by_period"></div>
<div id="humanist_top_terms_by_coefficient"></div>
You’ll notice I gave each div a unique id that corresponds to the name of the json file I saved when I created the Altair chart. This is important because we need to tell Pelican which json files to load for each div. We can do this by adding a metadata field to the Markdown file that tells Pelican which json files to load. This involves adding the following code block to the Markdown file:
Title: Data Analysis and Visualization
Date: 2024-04-17
Slug: data-analysis
Authors: Zoe LeBlanc
sortorder: 3
altair: True
scripts: humanist_top_terms, humanist_top_terms_by_period, humanist_top_terms_by_coefficient
Now we have two custom metadata fields: altair and scripts. We could have named these anything we wanted, but in our case we wanted to indicate that the page should load the Altair JavaScript files and which json files to load for the Altair charts. The scripts metadata field is a comma-separated list of the names of the json files we saved when we created the Altair charts. This is a way to tell Pelican which json files to load for each div.
The final piece of this puzzle is to use the vegaEmbed library to embed the Altair charts in the page. The vegaEmbed library is a JavaScript library that allows us to embed Altair visualizations, which are wrappers around Vega and Vega-Lite visualizations, in a web page. You can read more about the vegaEmbed library https://github.com/vega/vega-embed.
To use this library, I once again need to add some HTML, JavaScript, and Jinja2 code to the theme. I added the following code to the bottom of the article.html:
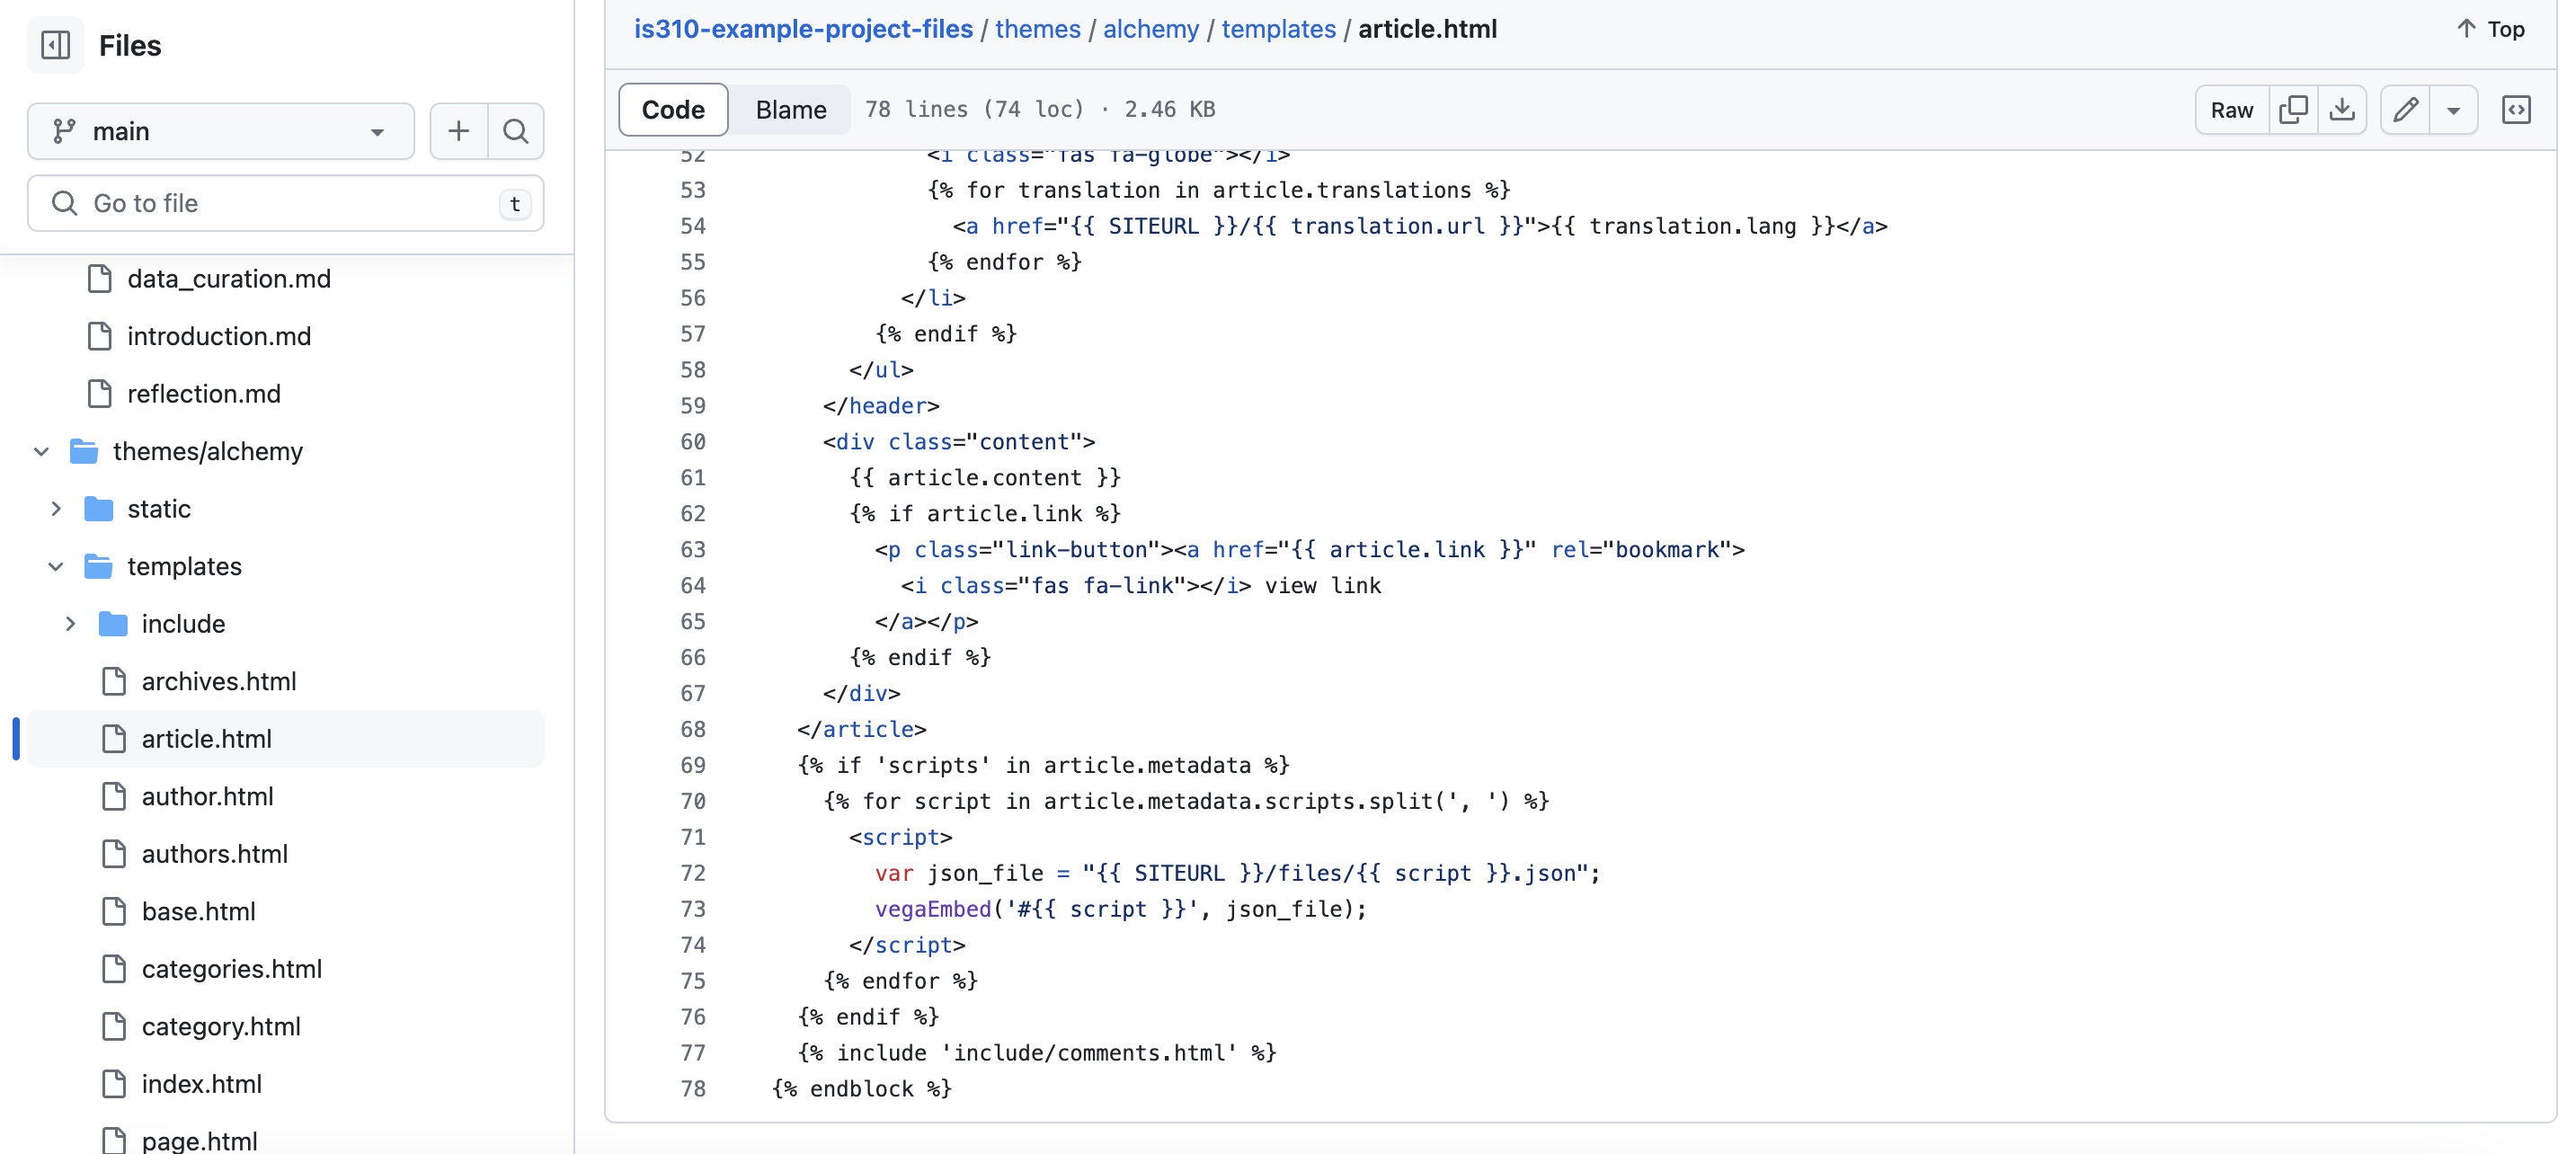
In this code, we ware using Jinja2 to first check if the article has a metadata field called scripts. If it does, we loop through the scripts metadata field and load the json files for the Altair charts, using each of the values that are common separated in that field. We then use the vegaEmbed function to embed the Altair charts in the page. This is a way to programmatically load the json files for the Altair charts and embed them in the page. You can explore the files in the repository, here https://github.com/ZoeLeBlanc/is310-example-project-files/blob/main/themes/alchemy/templates/article.html
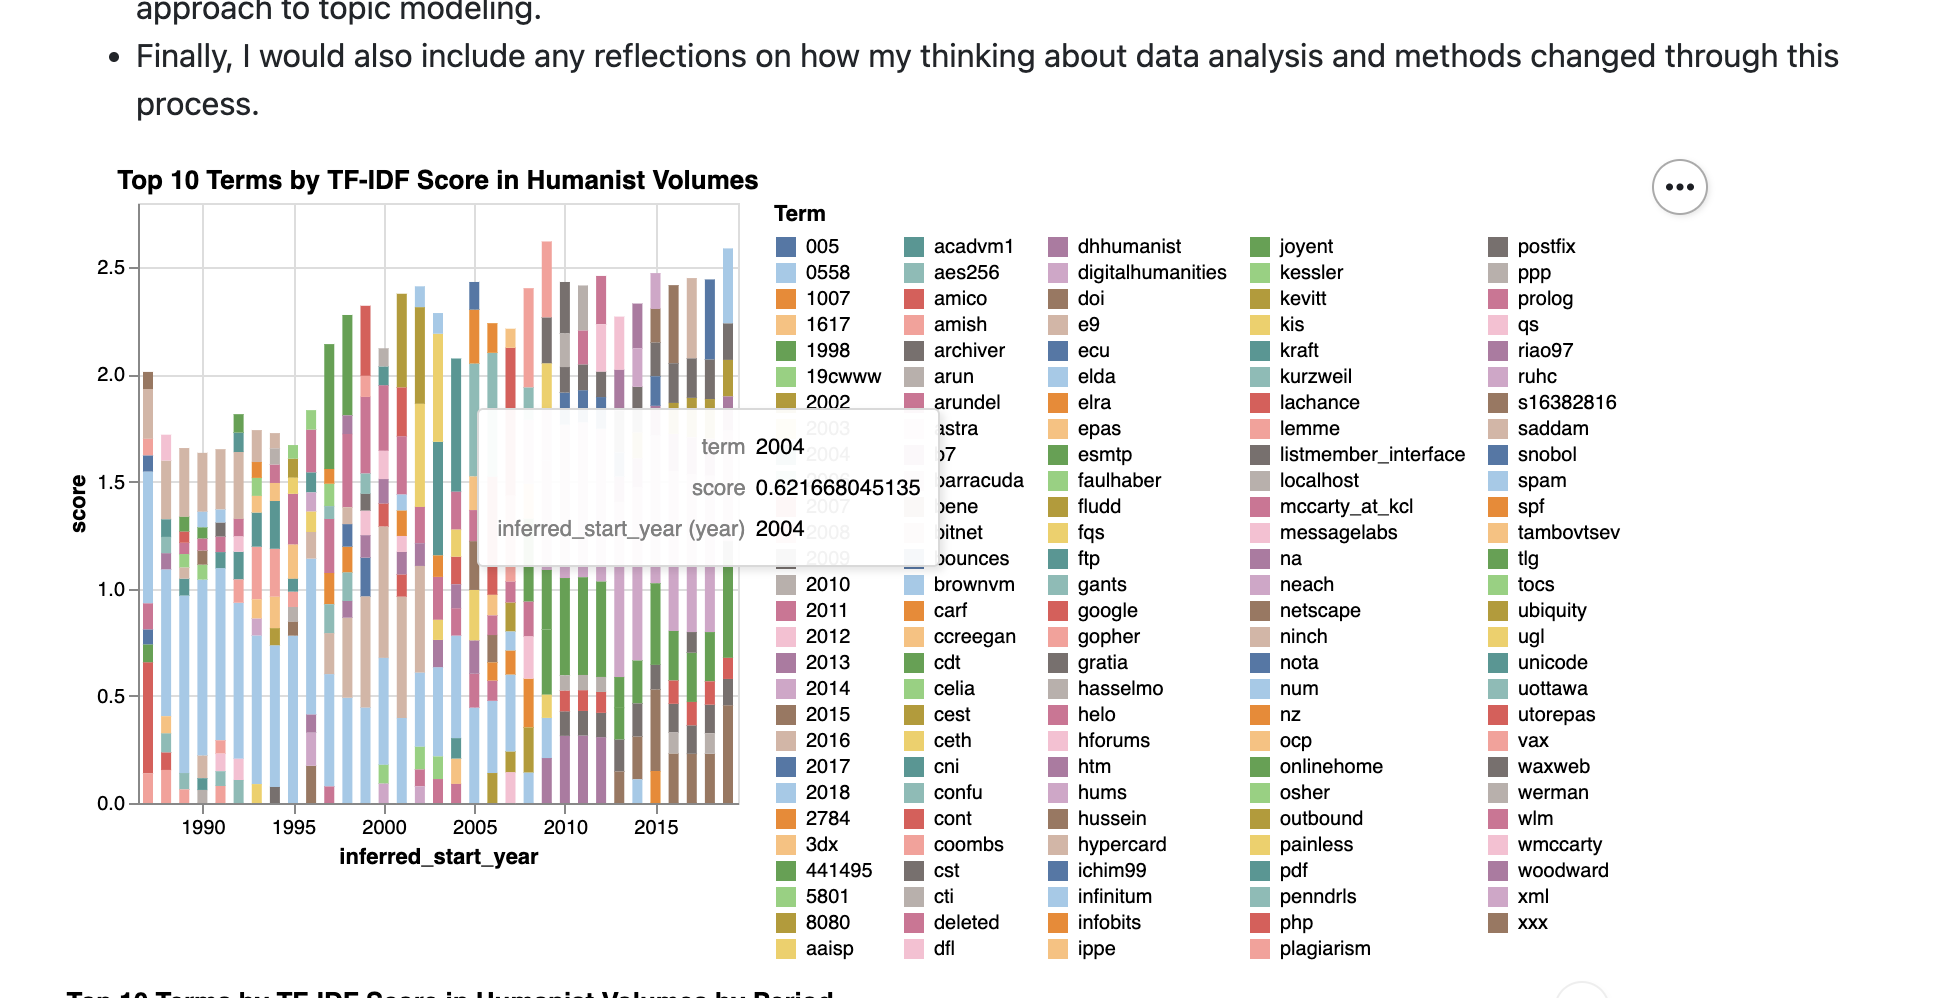
And the end result is a page with interactive Altair charts that are generated from the json files we saved when we created the charts, which you can view here https://zoeleblanc.com/is310-example-project/data-analysis.html:
Now the choice of adding this to the article.html file is partially because of how this theme was built, where each page is an article. So depending on the theme you’re using this might look slightly differently. But the key to thing to know is that we cannot add JavaScript directly to a Markdown file, so we need to add it to the HTML file that Pelican generates. This distinction might seem confusing, but again ask for help if you get stuck and feel free to use these files as a template for your own projects.
Publishing with Jupyter Notebooks
Another way to publish your work is to use Jupyter Notebooks. We’ve previously used notebooks when experimenting with code and visualizations, and you can review our notebooks lesson here. Publishing Jupyter notebooks is a bit easier than building a static site, but it does require some additional steps to make sure your notebooks are accessible and interactive.
Google Colab
One of the easiest ways to publish a Jupyter notebook is to use Google Colab. Google Colab is a free service that allows you to run Jupyter notebooks in the cloud, and it also provides a way to share your notebooks with others. You can read more about Google Colab here https://colab.research.google.com/notebooks/intro.ipynb.
To publish a notebook with Google Colab, you can create one directly in Drive, but I would recommend that you instead create a notebook locally like we’ve done in class and then publish that to GitHub. Once you have your notebook on GitHub, you can go to the following website https://openincolab.com/ and paste the GitHub URL of your notebook. This will generate some HTML code that you can use in either your notebook or a Markdown file to create a link to open your notebook in Google Colab.

So for example, with the following URL: https://github.com/ZoeLeBlanc/is310-computing-humanities-2024/blob/gh-pages/assets/files/notebooks/IntroNotebooks.ipynb we can generate the following HTML code:
<a target="_blank" href="https://colab.research.google.com/github/ZoeLeBlanc/is310-computing-humanities-2024/blob/gh-pages/assets/files/notebooks/IntroNotebooks.ipynb">
  <img src="https://colab.research.google.com/assets/colab-badge.svg" alt="Open In Colab"/>
</a>
Which creates the following button:
![]()
You can then embed this button either in your README.md file or the notebook itself on GitHub.
Binder
Another way to publish your Jupyter notebooks is to use Binder https://mybinder.org/. Binder is a free service that allows you to run Jupyter notebooks in the cloud, and it also provides a way to share your notebooks with others. You can read more in-depth documentation here https://mybinder.readthedocs.io/en/latest/introduction.html.
Similar to Google Colab, Binder works with notebooks hosted in a GitHub repository. Once you have your notebook in your repository, then you can go to the Binder website and paste the URL of your repository. This will generate a link that you can share with others, and they can use it to run your notebook in the cloud.
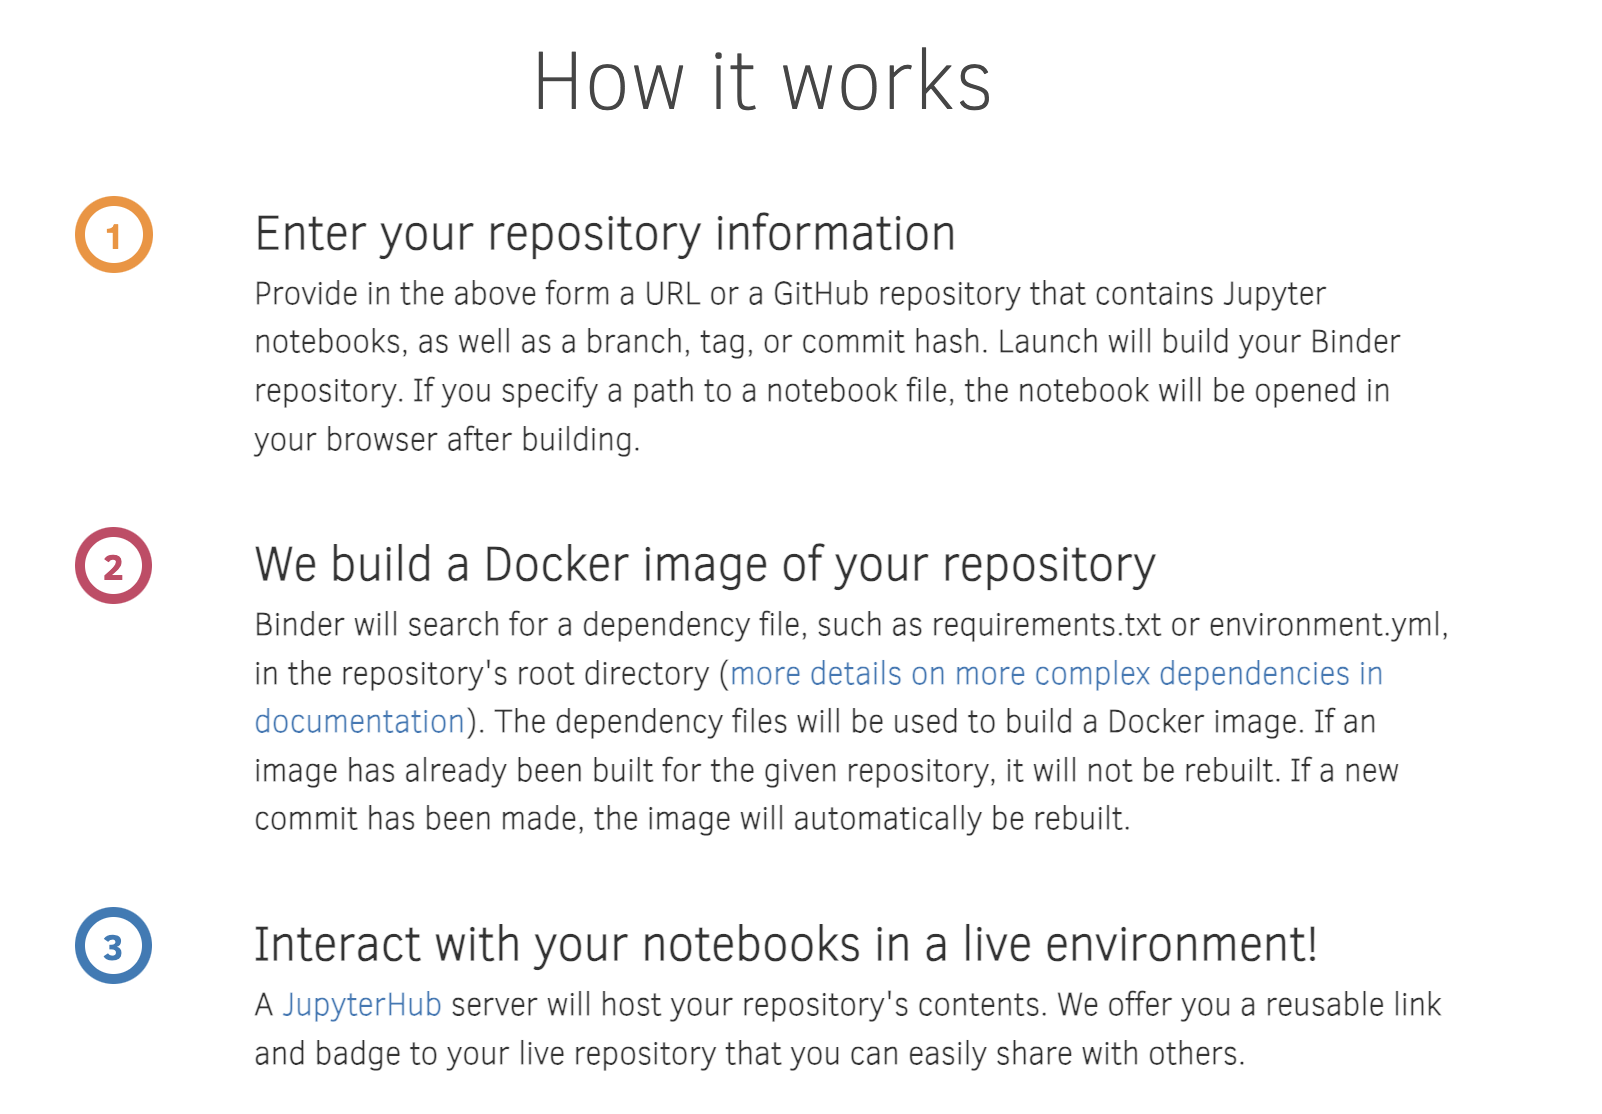
The above figure outlines how Binder works, but essentially it creates a Docker container that runs your notebook in the cloud. This is a great way to share your work with others, and it also allows you to run your notebooks on a different machine.
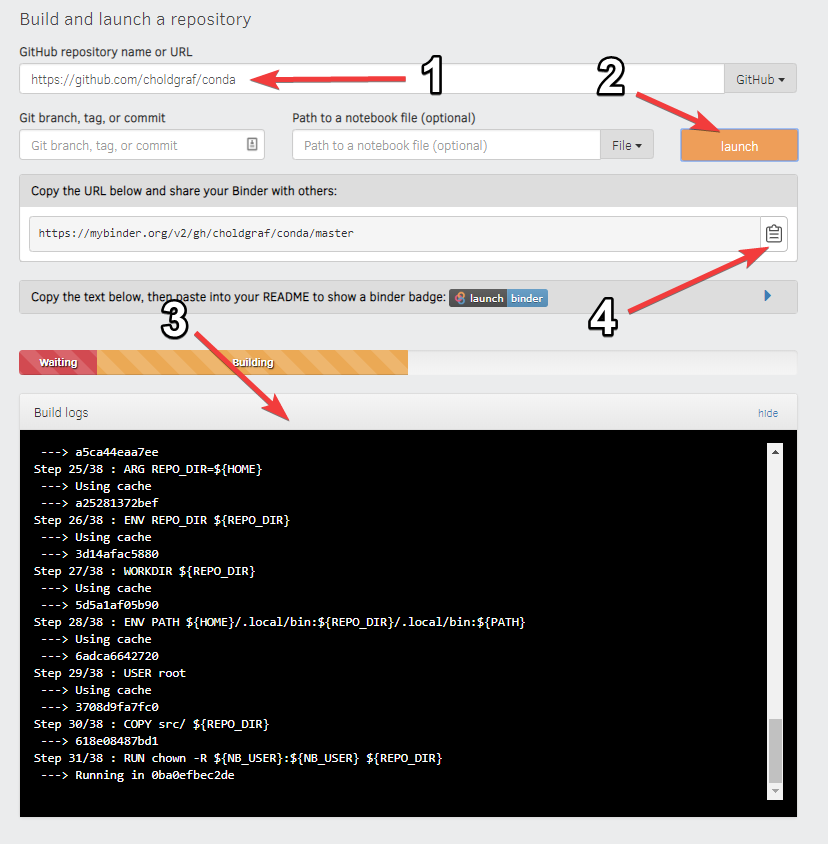
You’ll notice in the interface for Binder there is a place to enter your GitHub repository URL, and then you can click the launch button to start the container. This will take a few minutes to build, and you’ll notice that the Docker container is being built in the background. Once it’s finished, you’ll see the Jupyter notebook interface, and you can start running your notebook.
Once that is finished, you can share the link with others, and they can use it to run your notebook in the cloud. You can also create a launch binder button that you can embed in your README file or the notebook itself on GitHub. To create the button, you can use the following code:
[](https://mybinder.org/v2/gh/ZoeLeBlanc/is310-computing-humanities-2024/gh-pages)
This will create the following button:
![]()
And you can again embed this in your README.md file or the notebook itself on GitHub.
Remote Data & Images
Now that we have remote version of our notebooks published, we have one final issue which is how to include data or images in your notebook. You can upload files to Google Drive, but it can be a bit tricky to get the file path right and often requires providing permissions.
An alternative approach is to upload your files to GitHub and then use the raw URL to load the files in your notebook.
For example in the notebook above, I load the data currently as the following:
import pandas as pd
df = pd.read_csv("../web_scraping/cleaned_pudding_data.csv")
df.head()
This is because I’ve uploaded the data to the web_scraping folder in the repository. However, to get this working via Google Colab or Binder, I would need to upload the data to GitHub and then use the raw URL to load the data.
First, you need to find your data in GitHub and then click the raw button:
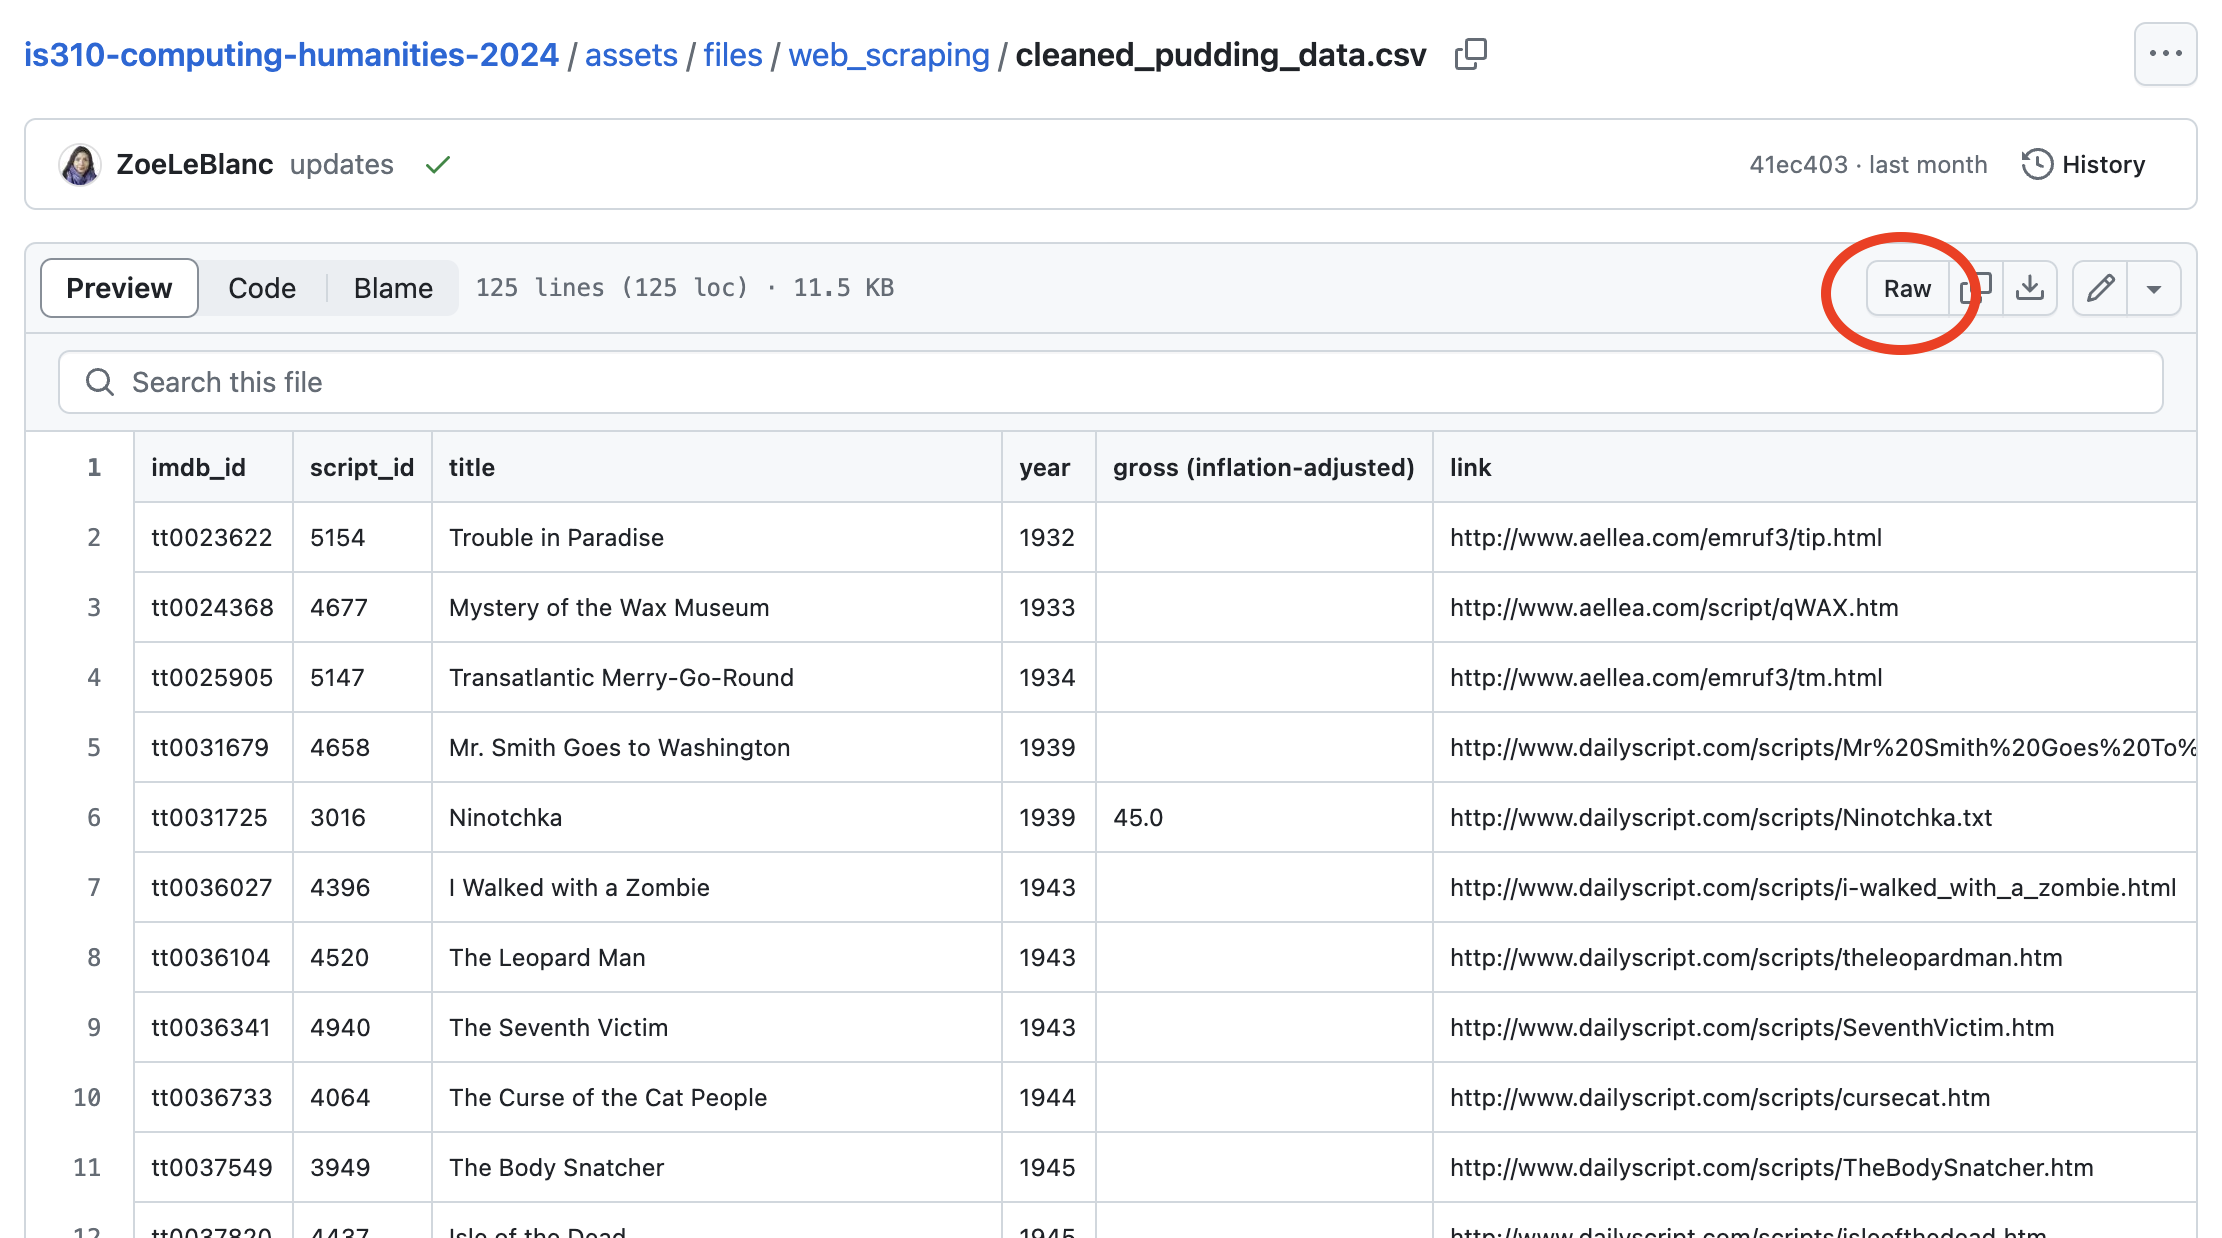
That should open a new page with just the data, and you can copy the URL from the address bar:

Then you just update your Python code to load the data from the URL rather than the file path:
import pandas as pd
url = "https://raw.githubusercontent.com/ZoeLeBlanc/is310-computing-humanities-2024/gh-pages/assets/files/web_scraping/cleaned_pudding_data.csv"
df = pd.read_csv(url)
df.head()
Now your notebook should be able to load the data from the URL when someone runs it in Google Colab or Binder. You can do the same thing with images or other files that you want to include in your notebook.