Introduction to the Command Line and File Formats
Introducing the Command Line
So far, you have been installing software via something called the terminal, but we have yet to explain what the terminal is or how it works.
Terminals are a way to interact with your computer via text commands. Today, we give usually commands to a computer via a Graphical User Interface (GUI), pronounced “gooey”. Any time you download an app, whether on your phone or computer, you are using a GUI. GUIs let us click on icons, drag items, and interact with our computers in a visual way. Terminals let us do many of the same functions, but we have to be more explicit and write these commands.
You’ve already experienced this when you checked your version of Python, for example, with this command python3 --version.
What are Terminals?
To really understand what terminals are, we need to learn a bit about the history of computing.

Back in the 1950s and 1960s, computers were the size of entire rooms and functioned through the use of something called punch cards.

As you can see in this example image, punch cards contained a series of holes that encoded information like numbers, letters, and even instructions for programs. These cards were fed into machines called card readers, translating the hole patterns into electrical signals the computer could understand. This enabled data entry for tasks like payroll calculations, statistical analysis, and even early gaming. The punch cards and computers were run by teams of operator, often comprised of women, who inputted these punch cards, prompting the computers to process and output the results on paper.
The term terminal then refers to the device that allowed operators to interact with the computer, and the command line refers to the text-based interface that allowed operators to input commands to the computer. The command line was the only way to interact with computers until the 1970s, when the first Graphical User Interface (GUI) was developed at Xerox PARC. This GUI was later adopted by Apple and Microsoft, and is the basis for the GUIs we use today.
Today when we use terminals, we are not just using the terminal but also using often using something called a shell. A “shell” is a program within a terminal that interprets user commands and processes computer output. Originating from the Unix operating system, the term “shell” signifies a user-friendly interface that encapsulates the complexities of various computer systems. Popular shell programs include bash (Bourne Again SHell), which is the default shell for most Linux distributions and MacOS; PowerShell, which is Windows default option, and zsh (Z Shell) – the optional configuration from our course tools. Each shell has its own set of commands and syntax, but they all share the same basic functionality.
For more on this history, I would highly recommend watching “Computer History: Punch Cards Historical Overview -IBM Remington Rand UNIVAC - History 1900’s-1960’s”, 2016. https://www.youtube.com/watch?v=kKJxzay85Vk.
The most important thing to understand is that the terminal is how you interface with the computer, the shell is the program that interprets your commands, and the command line is the text-based interface that allows you to input commands to the shell.
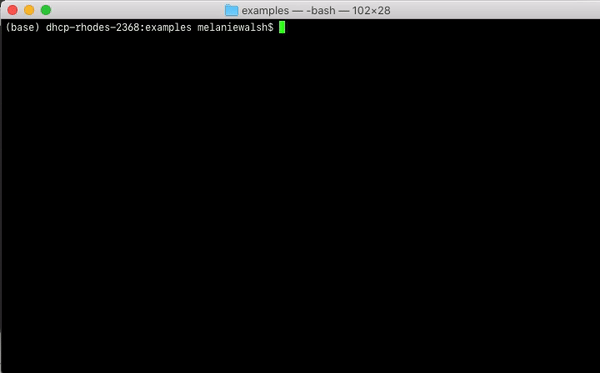
To help make this more concrete, compare these two images from Melanie Walsh’s textbook:
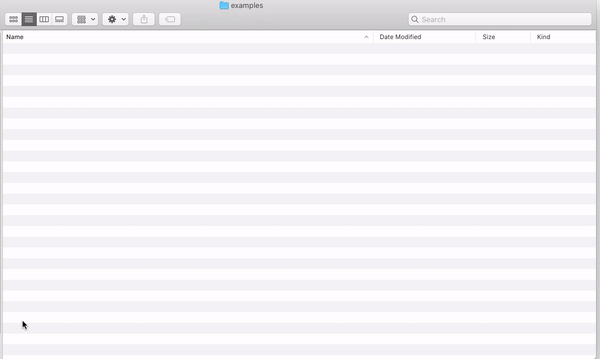
In the first image, we see that Melanie is using the Mac Finder App to interact graphically with her file folders. This app is a GUI, so she is clicking and moving files around with her mouse.
In the second image, we see that Melanie is using the terminal and typing commands to move files around. We can see that the top of her program says bash, indicating which shell she is using, and then she is typing commands like mkdir and rmdir to create and remove directories.
These images give you a sense of how the command line works, and how we use it. So let’s start learning some commands!
Working With The Command Line
From Melanie’s example, we can see that the command to create a directory is mkdir. Let’s try it out!
First, we need to open our terminal, which we can do through VS Code. To do this, click on the Terminal tab in the top menu bar and select New Terminal. This will open a new terminal window at the bottom of your screen.
Then we need to figure out the correct syntax or wording to use the mkdir command. We can see from Melanie’s example that she types mkdir and then Intro-CA-Notes.
mkdir Intro-CA-Notes

If we press enter, it should seem like this works but how do we know for sure?
We have two options. First, we should take a look at the Command Line cheatsheet that contains a number of these commands and see what would be the best option to help us check if this worked.
Our other option is to try and start testing out these AI Chatbots, and specifically GitHub Co-Pilot (though again you are welcome to use any AI tool that is free and helps you understand these materials).
To use these tools, though we first have to discuss their interface and how they work.
Prompt Engineering
So far we have been doing a form of prompting, called Command Prompt, which refers to where we write the text commands in the terminal. Often times the command prompt is a symbol that indicates the start of a new command. For example, in Melanie’s example, the command prompt is the $ symbol. This symbol is called a prompt because it prompts you to enter a command. The prompt is followed by a cursor, which is the blinking vertical line that indicates where your next character will appear. Other symbols you might see include #, %, and >.
Now, the term prompt has become incredibly popular in the last few years, beginning with the release of GPT-3 by OpenAI in Summer 2020 and their use of prompt engineering to describe giving commands or prompts to chatbots for certain outputs or results.

While there idea of prompt engineering has a longer history in natural language processing, the term has taken over, with the proliferation of new AI chatbots and models.
In some ways our idea of giving text prompts to the terminal via the command line echoes how we do prompt engineering for AI chatbots, since both require writing text (something we’ll discuss more later in this lesson).
But while depending on your operating system, terminal, and shell, you have to give the command line certain set of commands that have been previously programmed, with AI chatbots you can write without those set structures.
However, that doesn’t mean there aren’t some helpful guidelines for prompt engineering, even if the process often requires lots of trial and error, and is rarely reproducible or transparent.
If you search for tips on prompt engineering, you’ll find lots of infographics like this one:
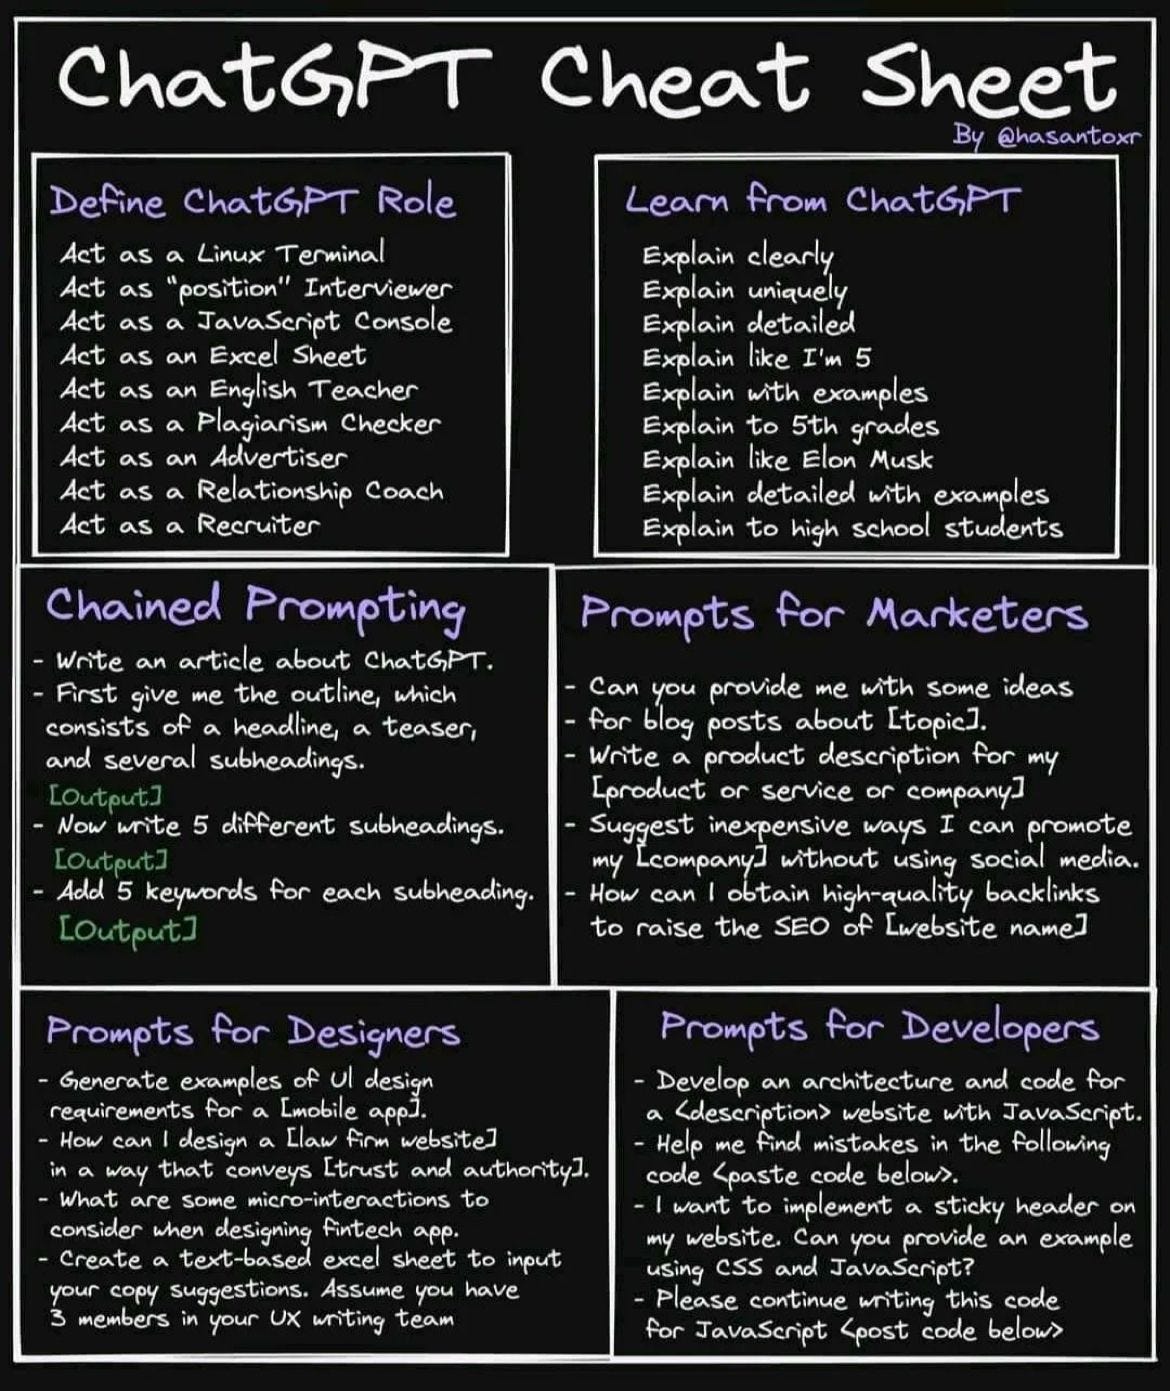
These outline some of the core ways to think about prompt engineering (concepts like defining a role, chained prompting, and so on). But Microsoft actually provides more detailed guidelines for Co-Pilot, since it has been trained primarily for coding tasks, https://learn.microsoft.com/en-us/training/modules/introduction-prompt-engineering-with-github-copilot/2-prompt-engineering-foundations-best-practices.

In this overview, they propose the 4S of Prompt Engineering: Single (keeping your prompt to one task or question), Specific (having detailed requests and specifications), Short (concise), and Surround (keep relevant files open in Co-Pilot).
While these are general guidelines, the final one is particularly important for Co-Pilot, since it works best when it has code examples to learn from (something called few-shot learning, for those that are interested).
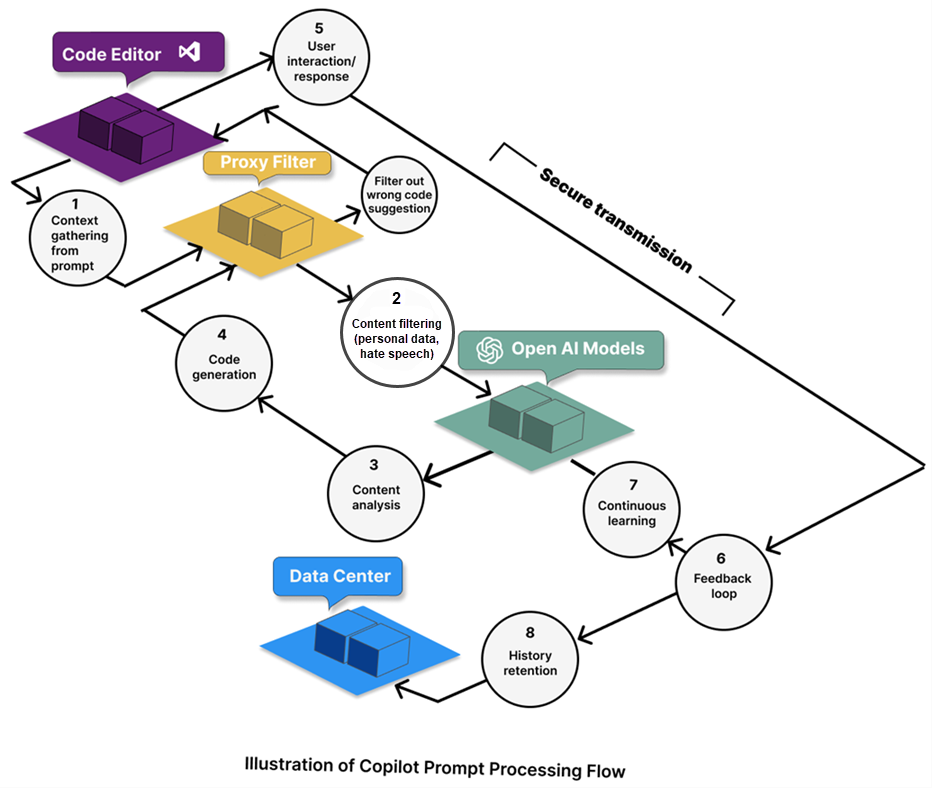
This very complex diagram details what GitHub Co-Pilot does with your prompt, and how it processes it. The key thing to understand is that it is looking for patterns in the prompt and then trying to match those patterns to code examples it has seen before. So the more specific and detailed your prompt is, the more likely it is to find a match.
The other key thing to know is that even though it claims to be secure, there’s a lot of potential for personal data to be leaked through this process. So it’s important to be careful about what you prompt Co-Pilot with, and to be aware of the potential risks (i.e. don’t share sensitive information in a prompt!!).
As we’ve hopefully discussed a bit by now, the legality of Co-Pilot remains hazy (not to mention the ethics or politics of it). You’ll likely see why as we continue to work with it, as it autocompletes file names and other information from GitHub that it has scraped. Again, I want to stress the use of this tool is optional, but also encourage you to see your use of it in a critical lens: what helps us critique these tools is often using them and understanding not only how they work, but whether the hype and their claims live up to the reality of using them.1
Directories and File Paths
So returning to our original question, hopefully by now we have discovered some of the commands we can use to check if our directory was created, using the Command Line cheatsheet. But we could also try out generating a prompt for GitHub Co-Pilot and see what it suggests.
Click the button to see some potential answers.
So looking at the cheatsheet, two promising commands include ls and pwd. We can try those out, and also try out a prompt for GitHub Co-Pilot.
How can I check if my directory was created in my terminal?
Should I use the command ls or pwd to check if my directory was created? And what is the difference between these two commands?
How can I create a directory named is310-computing-humanities in my terminal?
With the help of the cheatsheet and GitHub Co-Pilot, we should see that the command ls lists the contents of a directory, and pwd prints the full working path. So we can use these commands to check if our directory was created.
And then we can use the command mkdir to create a directory named is310-computing-humanities.
mkdir is310-computing-humanities
Using these commands, we can see that our directory was created. But what does this mean exactly?
As we read this week, how we interact with computers has increasingly made it difficult to understand where our files are stored. While search functionality often takes care of this for us in GUI applications, in the command line we have to be more explicit about where we want to store our files and we have to know where we are located.
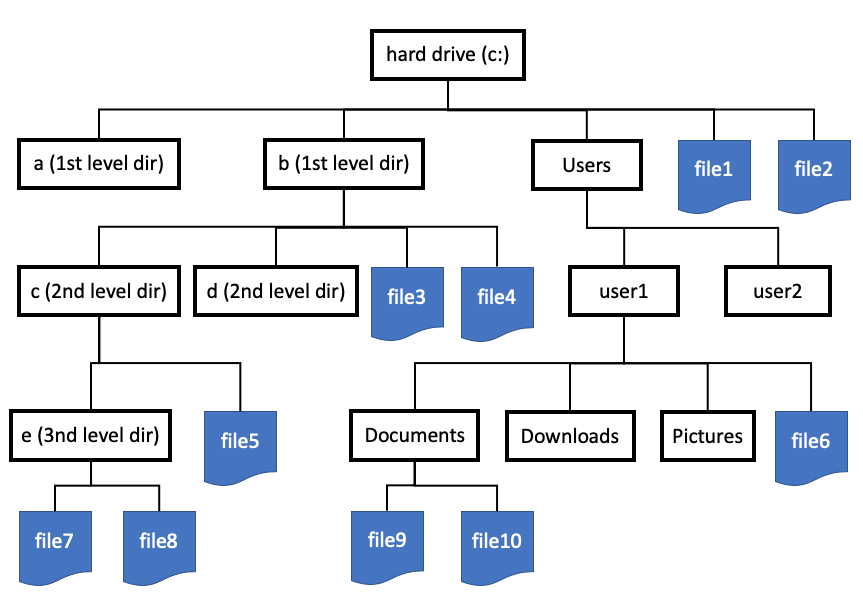
In this figure, we see a representation of how folders and files are organized on a Windows computer. The top level is the root directory, which on Windows is the C: drive. On Macs and Linux machines, we have a similar root directory, but it is represented by a / symbol. This root directory contains all of the files and folders on your computer. The root directory is also called the parent directory because it is the parent of all the other directories on your computer.
Important to know: directory is the same as folder, and the two are often used interchangeably. Directory is the original term, but with GUIs we often use the term folder.
In this diagram, we can see that there is a Users folder or directory. This is where most of your files that you download or create are stored: under your user account and in the Documents, Downloads, and Desktop folders.
If I use the pwd command, I can start to see this structure.

You’ll notice the command prints out a long string that has names like Users, followed by a series of names separated by a forward slash / (in PowerShell, you’ll see backslashes \). Each of these are my folders or directories, and this represents the absolute file path from my root directory to my current directory – that is the current location of my terminal. I realize this might be a bit confusing initially, but eventually as you use the command line more, you’ll start to get a sense of how this works.
Each file path is unique to your computer, and so if you are following along with this lesson, you’ll see a different file path, though there should be a Users folder as your root or home directory.
You’ll also notice I did the command cd ~. What do you think this command does? What does cd stand for do you think?
A core distinction with how I used this final command is the fact that I used a tilde ~ symbol. This symbol is a relative file path, meaning it is relative to my current directory. So if I am in the Documents folder, cd ~ will take me to my home directory. You can also use cd .. to go up one directory, and cd ../.. to go up two directories, and so on.
Beyond creating directories (which again is just a fancy term for file folders), we often use the command line to create files. To do this, we use the command touch. Let’s try it out!
touch is310-computing-humanities.txt
Now we should see both our folder and our file in the terminal. But ideally, we would have the file in the folder. So how do we do that?
We can use the command mv to move the file into the folder. Let’s try it out!
mv is310-computing-humanities.txt is310-computing-humanities
Now we should just see our folder if we do ls in the terminal. But how do we check if our file is in the folder?
We can again use the command cd to change into the folder, and then use ls to list the contents of the folder. Let’s try it out!
cd is310-computing-humanities
ls
Finally, let me try leaving my directory and deleting it. To do this, I can use the command cd .. to go up one directory, and then rmdir to remove the directory. Let’s try it out!
cd ..
rmdir is310-computing-humanities
Now if I do ls I should see that my folder is gone.Success!!
In Class Exercise
Now it’s time for you to try out some of these commands on your own. Using a combination of our cheatsheet and your preferred AI chatbot, try to complete the following tasks:
- Create a new directory called
is310-computing-humanitiesin yourDesktopfolder - In your
is310-computing-humanitiesfolder, create a new file calledis310-computing-humanities.txt - Try adding some text to your file using the command line (this is a new command, so you’ll have to look it up!)
- Try displaying the contents of your file using the command line (again a new command, so you’ll have to look it up!)
- Finally, try leaving your folder and returning to your home directory.
Optional Advanced Option:
- Try copying your folder and then deleting the copy. Remember to ask for help from the Instructors, if you need it!
So now we are starting to see how we can use the command line to create directories and files, and move them around. It seems like we’re doing a lot of work to do something that we could do with a GUI, but the command line is actually much more powerful than a GUI. For example, we can use the command line to do things like search for text in a file, count the number of words in a file, and even delete a file.
Before we try that though, let’s learn a bit more about what files are exactly.
Introducing File Formats
What constitutes a document or a file might seem obvious, but is actually a robust and ongoing scholarly debate in Library and Information Sciences (LIS) and Computer Science (CS). To put it a bit simply, a file is a collection of data stored in a single unit, identified by a filename. It can be a document, an image, a video, a sound, or any other collection of data. The file extension is the part of the file name after the period. The file extension tells the computer what type of file it is and what program to use to open it.

There are many different file formats and each one has its own purpose. For example, a .docx file is a Microsoft Word document, a .jpg file is an image, and a .mp3 file is an audio file. Some file formats are proprietary, meaning they are owned by a company and can only be opened by certain programs. For example, .docx files can only be opened by Microsoft Word. So if you try to open up a word document in a PDF Viewer you might see what looks like a bunch of gibberish.
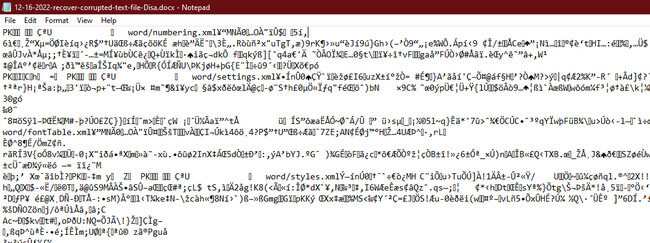
This gibberish is actually the code that makes up the file, but since the PDF Viewer doesn’t know how to read the code it just shows you the code itself rather than the data stored in the files.
Other file formats are open source, meaning they are not owned by a company and can be opened by many different programs. For example, .txt files are plain text files that can be opened by any text editor. When we used the touch command, we told the terminal to create a .txt file. This is because .txt files are the simplest file format and only contain text. They do not contain any formatting like bold, italics, or images.
What is Plain Text?
Today, we have been talking a lot about text, from text commands to text files. But the core concept with both of these is the idea of plain text.
As scholars working with computers, we need to be aware of the ways plain text and formatted text differ. While a Word Document ant .txt file might look the same to us, the Word Document actually contains a lot of hidden formatting that the .txt file does not. In programming, we want to be explicit in our communications with computers and so plain text is preferable, but what is it exactly?
According to the Unicode Standard,
Plain text is a pure sequence of character codes; plain Unicode-encoded text is therefore a sequence of Unicode character codes.
This is a bit technical, but the key concept is that plain text shows if it is formatted or not (we call this markup), and usually contains no formatting. Plain text can be moved between programs more fluidly and can respond to programmatic manipulations. It is often manipulated in something called a text editor (like VS Code), which is a program that allows you to edit plain text files.
We can see an example of a plain txt file, via Project Gutenberg - a website that hosts public domain books in plain text format.

I can download this file directly from my terminal using the command line:
curl https://www.gutenberg.org/files/1342/1342-0.txt > pride-and-prejudice.txt
In this example, I’m using the command curl to download the file from the internet. The > symbol tells the terminal to create a new file, store this data in the file, and save the file as pride-and-prejudice.txt. We can see that this file is a .txt file, meaning it is a plain text file. curl stands for “client URL” and is a command line tool for transferring data and downloading files from the internet. We can also use it to upload files to the internet.
If you are on a Windows computer, you can instead use the command wget to download the file from the internet. The syntax is the same, but the command is different.
wget https://www.gutenberg.org/files/1342/1342-0.txt > pride-and-prejudice.txt
wget stands for “web get” and is a similar command line tool for retrieving and downloading files from the web.
If you are using PowerShell and not WSL (again WSL is recommended!), the command looks slightly different:
wget https://www.gutenberg.org/files/1342/1342-0.txt -OutFile pride-and-prejudice.txt
Now that we have downloaded this file, we can use the command line to display some of the text:
cat pride-and-prejudice.txt
cat stands for concatenate, and is a command line tool for displaying the contents of a file. We can see that this file contains the text of Pride and Prejudice by Jane Austen (though you’ll likely only see the end of the text since it is so long, without scrolling for ages).
We can start to interact with this file in a number of ways.
First, let’s count how many words are in this file. To do this, we can use the command wc -w. Let’s try it out!
wc -w pride-and-prejudice.txt
wc stands for word count, and the -w flag tells the terminal to count the number of words in the file. You’ll often notice that commands have flags like this, which are additional instructions for the command.
We can also use the command wc to count the number of lines in a file with the -l flag. Let’s try it out!
wc -l pride-and-prejudice.txt
We should see that there are 14911 lines in this file.
We can also search for a specific word in a file using the command grep. Let’s try to find out how often the word “pride” appears in this file. To do this, we can use the command grep pride pride-and-prejudice.txt. Let’s try it out!
grep pride pride-and-prejudice.txt
This should give us the following output:

How could we count the number of times the word “pride” appears in this file? We could use the command wc -w to count the number of words, but that would include the word “pride” in the title of the book. We could also use the command wc -l to count the number of lines, but that would include the line numbers. Instead, we can use the command grep -c pride pride-and-prejudice.txt.
We can see that the word “pride” appears 43 times in this file. How many times does the word “prejudice” appear?
Homework Exercises
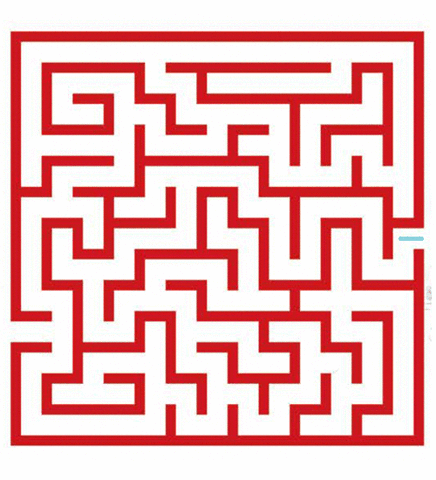
Assignment 1: Find Your Way: Solve A Command-Line Corn Maze
Your first assignment, which you are welcome to work in pairs, is to solve an existing command line maze. You can find the maze here: as a zip file or via our GitHub repo All links should be working, but if you have trouble please try reloading the website and contacting the instructor! You should download the zip file, and use the command line to unzip the file and then solve the maze.
To unzip the file, you can use the command unzip path/to/your/zip/file -d path/to/your/desired/directory if you are running Unix/Linux (so Macs, Linux, and the Window Subsystems for Linux – all of which are recommended). If you are using PowerShell, you will need to use the command Expand-Archive -Path "path\to\your\zip\file" -DestinationPath "path\to\your\desired\directory. Be sure to replace these dummy file paths with your actual desired ones (or ask AI for help!). Your goal with this maze is to use both the command line cheatsheet and your preferred AI chatbot to solve the maze. You should be able to solve the maze in ~30 minutes, but if you are struggling, please reach out to the instructors via Slack for help.
Assignment 2: Time To Get Lost: Create A Command-Line Corn Maze
For our Tuesday class next week Thursday class, your goal is to create your own command line maze, which we will try to solve in class. You should work individually on this, though you are welcome to brainstorm ideas.
Your maze should have the following components:
- An entrance and a solution
- At least 5 directories (these can be nested)
- At least 5 files (these can be nested)
- One hidden file or directory
- Clues to help us solve the maze
You are welcome to use Project Gutenberg https://www.gutenberg.org/ for your files, but you can also use other files if you prefer. You can also use the command line to create your files, but you can also use a text editor if you prefer.
Additional Resources
In addition to the resources, I linked at the beginning of this lesson, I would recommend the following:
- Ian Milligan and James Baker, “Introduction to the Bash Command Line,” The Programming Historian 3 (2014), https://programminghistorian.org/en/lessons/intro-to-bash. This is an introduction to the Bash shell, which will serve well enough as an introduction to other shells like Zsh as well.
- Bash Basics Part 1 of 8 Access and Navigation
- Beginner’s Guide to the Bash Terminal
- The Most Important Thing You’ll Learn in the Command Line
- Go through the CodeAcademy command line course.
- Shell Scripting Tutorial
-
If you have serious concerns over GitHub Co-Pilot, I’ve just learned of Privy, a private and locally run version of a coding assistant https://github.com/srikanth235/privy. I haven’t had a chance to try it yet, but seems like a promising alternative. Another option is gpt4all which let’s you run a number of models locally (though anecdotally some of my previous students struggled to install it on their computers, so ymmv). ↩